Table of contents
- Setup and reading sensor values
- Using iSDIO while reading the SD card
- Sending measurements from Arduino to Raspberry Pi
- Visualizing on Raspberry Pi — completion
My wife said she wanted a thermometer/hygrometer, so I built one.
The setup reads temperature and humidity with an Arduino, sends the data via FlashAir to a Raspberry Pi, and displays it on a web page.
[Key points in this series]
- Connecting FlashAir, Arduino, and Raspberry Pi to visualize sensor data
- Measuring temperature and humidity with DHT22
- Converting floats to strings in Arduino
- Using FlashAir's iSDIO for WiFi while also using it as an SD card (covered in the next article)
- Displaying a bubble chart with Chart.js (covered in the next article)
Here's what the finished product looks like:

Multiple rooms are shown in the chart, but there's only one device.
I just wanted to compare different spots, so I took measurements in each location and overlaid the data.
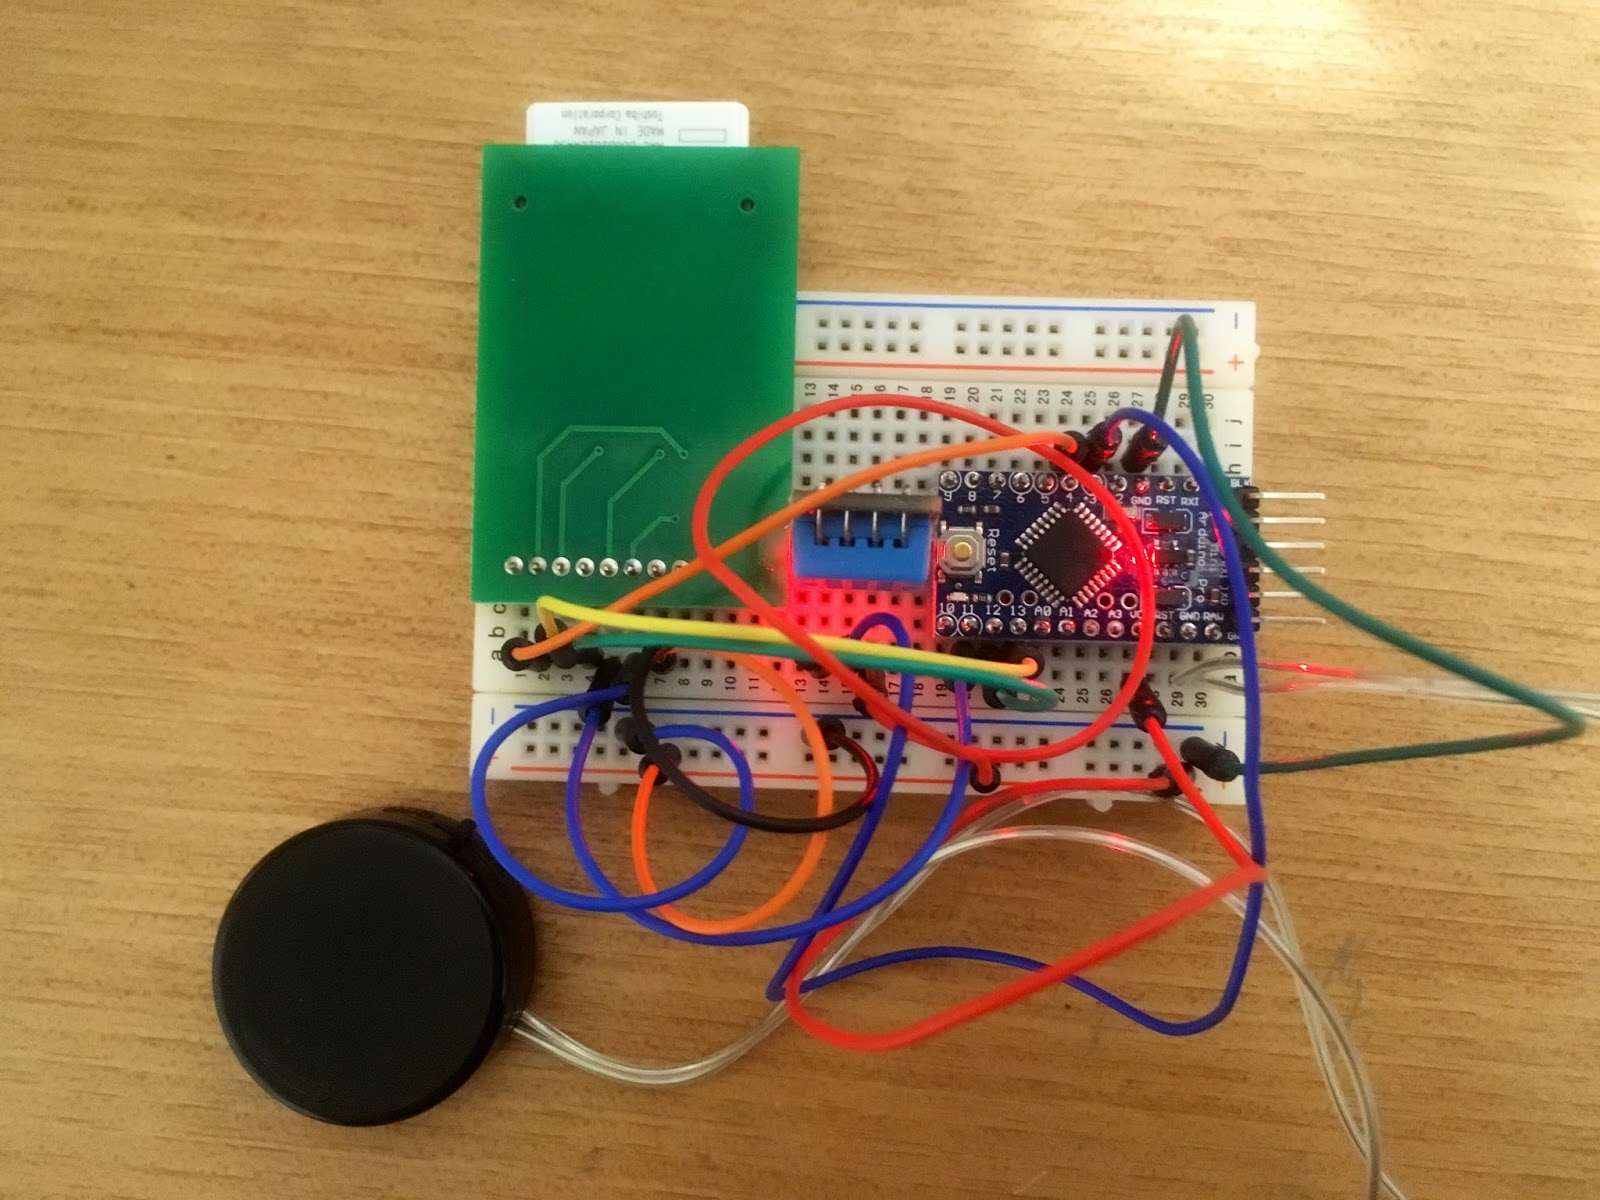
The device itself looks like this.
My client (wife) remarked, "That's not quite what I had in mind." High praise.
Overall Design
An Arduino Pro Mini reads temperature and humidity from the sensor.The data is sent to a Raspberry Pi using FlashAir's iSDIO feature.
Finally, the Raspberry Pi serves a web page with a chart, displayed on an iPad.

It's possible to connect an iPad directly to the FlashAir and skip the Raspberry Pi,
but that would require the FlashAir to stay connected to WiFi continuously, draining the battery fast.
With this design, the FlashAir only activates WiFi when transmitting data,
so the Arduino can run on batteries.
Battery power means it can be placed anywhere — inside cabinets, closets, wherever there's no outlet.
Communication sequence:

Parts
Temperature/Humidity Sensor — DHT22
Check on Amazon An inexpensive temperature/humidity sensor.Available as a bare sensor or as a breakout module — they're similarly priced, so I recommend the module.
The module has a built-in pull-up resistor, which simplifies wiring.
The difference between DHT11 and DHT22 is measurement accuracy.
DHT22 gives decimal readings for both temperature and humidity.
Since I round to integers anyway, DHT11 would technically be sufficient.
Actually, DHT11 was the one that came in the sensor set I received as a gift.
[Update 2017/04/10]
Check on Amazon I ended up switching to DHT22 in the end.
Comparing DHT11 and DHT22, the accuracy difference was significant — not just decimal places, but actual measurement quality.
The chart comparison says it all:
Left is DHT11, right is DHT22.
The measurement days differ so it's not a perfect comparison, but DHT22 shows much clearer differences between locations.
DHT11 was reading about 20% humidity everywhere — bone dry, every room.


Arduino Pro Mini
Check on AmazonThe Arduino Pro Mini — every household has a few of these lying around.
Cheap: under ¥500 each.
You can buy about 10 Pro Minis for the price of a single Arduino UNO.
When you supply 5V to the RAW pin, the ACC pin outputs 3.3V.
Since most sensors and SD cards run at 3.3V, you can connect them directly — convenient.
FlashAir (W-02 or later)
Check on Amazon Another thing every household has.iSDIO is required for this project, so W-02 or newer is mandatory.
Storage-wise, it only needs to hold a config file — capacity doesn't matter.
SD Card DIP Breakout Module
Check on Amazon I used a module from Akizuki Denshi.Amazon doesn't carry the exact same one, but the linked item should be functionally equivalent.
Coin Battery Holder + 2× CR2032
Check on Amazon This holder fits two CR2032 batteries.CR2032 nominal voltage is 3V, but under load it can drop to around 2.5V.
Reference: What kind of battery is CR2032? Comparison of 7 major manufacturers
Two CR2032 cells in series produce ~5V, enough to drive the Arduino Pro Mini on battery.
Note: I didn't implement serious power-saving measures in this project,
so the batteries drain fairly quickly.
For long-term use, connecting a USB power bank via a serial module would be more practical.
Circuit Diagram
The circuit is very simple —just connect DHT11 or DHT22 and an SD card to the Arduino Pro Mini.
That's it, because it's FlashAir!
One thing to watch: depending on the module manufacturer, DHT11 and DHT22 may have VCC and GND reversed.
Connecting them backwards will damage the sensor, so always check the PCB silkscreen.
Also: the external 5V supply goes to the Arduino Pro Mini's RAW pin,
while the SD card and DHT are connected to the 3.3V ACC pin.
Wrong voltage = FlashAir won't work.
Also, when the battery gets low and voltage drops, Arduino keeps running but
FlashAir starts throwing random errors — a mysterious and unpleasant experience.
For Arduino UNO: use Vin instead of RAW, and the 3.3V pin instead of ACC.

Measuring Temperature and Humidity with DHT22
The Adafruit library makes this easy.Recent versions of Arduino IDE can install libraries from a ZIP archive.
Download the ZIP from the library's GitHub and load it in Arduino IDE.
Reading values looks like this.
For DHT11, just replace read22 with read11 — everything else is the same:
#include <dht.h>

#define DHT_PIN 3
dht DHT;

void setup() { }

void loop() {
  int chk = DHT.read22(DHT_PIN);
  if ( chk != 0 ){
    Serial.println(F("Fail to read humidity."));
    return;
  }
  char humid[8];
  char temp[8];
  char param[32];
  sprintf(param,"H=%s&T=%s",
    dtostrf(DHT.humidity,5,2,humid),dtostrf(DHT.temperature,5,2,temp));
  Serial.print("PARAM:");
  Serial.println(param);
}
The string concatenation is for building HTTP parameters to send via FlashAir.
In standard C you'd just use sprintf with %f, but Arduino's sprintf doesn't support floating-point output.
Instead, the dtostrf function converts a float to a string:
- 1st argument: the float to convert
- 2nd argument: total field width (including decimal point)
- 3rd argument: number of decimal places
- 4th argument: output character buffer
- Return value: pointer to the 4th argument
Next: making FlashAir act as both an SD card and a WiFi client simultaneously, and collecting data on the Raspberry Pi.
No comments:
Post a Comment