I've spent the better part of eight years — since 2017 — gradually building my own crypto auto-trading system. Now I've published a book on Zenn that explains how it's designed, validated, and operated. Targeting BTC/ETH, it's an implementation how-to that walks through the trading logic, parameter optimization, and capital allocation, all the way to building the operational system, with real code and measured numbers.
And here's the twist: the book itself — the text, the illustrations, the cover — was written by AI. I'll introduce what's inside first, then talk about how it was made.
The book's cover. The background art was generated by an image AI; the title text was placed by a human.
What you'll learn
What the book — Building a Personal Crypto Auto-Trading System — From Design to Operation [Complete Edition] — actually covers
The behind-the-scenes of an AI writing, illustrating, covering, and QA-ing a whole book through to publication
How AI is used to the hilt in both building the system and writing the book, while the human keeps the direction and the final call
What kind of book is it: a transparent record of design and "failure"
Ch. 7 — Splitting work across three machines: availability, compute, interactivity
Ch. 8 — Three-layer config and multi-user operation
Closing — looking back over the whole
From the strategy algorithms (Part I) to the operational system (Part II), it backtests roughly three years of trades at high speed on Python and a GPU-equipped PC, so you can follow the design — and the failures — in code and measured numbers.
The theme isn't "the success story" but a transparent record of design and failure. A 1,800-line market-regime detector scrapped wholesale because of overfitting. An optimizer that misjudged a "98% drawdown" as a good score. These dead ends get top billing in each chapter. The trading "brain," too, is no flashy AI prediction: it's just Bollinger Bands and a linear-regression trend, organized into prioritized rules.
This "don't rely on flashy prediction" stance wasn't a belief I started with — it's a conclusion reverse-engineered from failure. The starting point was 2017. My first attempt was machine learning with TensorFlow on price history, and it didn't work at all. After failing hard at "trying to call the future," I settled on plain indicators. The book's stance — "don't let AI predict the market, but use it to the hilt for design and implementation" — comes from this eight-year experience.
Behind the scenes: built by a team of AIs with different roles
Several AIs with different roles went into making this book.
(1) Technical source (the system's developer) and technical reviewer: provides the facts the text needs and checks technical correctness. Facts not in the source material aren't invented — they're verified against the real code and real data.
(2) Advisor and prose reviewer: a sounding board for "going public" decisions like platform choice and editorial direction, and a reviewer of the writing before release. The pricing and title exchanges below were debates with this one.
(3) Illustrator: the chapter illustrations. This one is actually the "high-school AI" from a separate blog, ai.andhandworks.com, moonlighting as the artist.
(4) Writer: writes the body of each chapter.
For the cover, (3) generated the background, and a human placed the title text (because AI-made covers tend to look generic). Before release, a gate runs every chapter through automated checks for banned words and leaked sensitive info (account names, hostnames, IPs, keys).
Writing, drawing, researching, checking, consulting — each handled by a different AI, with the human judging the output. That's the division of labor.
One of the AI-generated chapter illustrations — depicting the system's "brain" (a combination of plain indicators).
The human's role: set the direction, use AI as the "maker"
The human's role has shifted from doing the work by hand to deciding the direction and letting AI make things. It's the same for the system and for the book. Here's what the human decided in producing the book:
Goals and publication structure: the book's structure (parts and chapters), and what's free.
Final call on price, title, and search keywords.
Creative direction: e.g. specifying the cover motifs (blueprints, a timer, a pile of coins, servers and microcontrollers).
Final fact-checking and the publish action: a human flips the publish toggle.
And this relationship is not one-way. The AI proposed things the human rejected, and the human's ideas got reworked by the AI. Two examples.
Example 1 — Pricing: the AI put the brakes on "¥2,980"
When we discussed price, the AI first offered "worth ¥3,500 by content, but ¥3,000 given no track record yet." I countered with "what about ¥2,980 or ¥3,200?" The AI pushed back — "odd-number prices look like an infoproduct and hurt the brand; the psychological effect is weak for a tech book; and Zenn only allows ¥100 increments" — and recommended a round number. In the end, I was the one who said "even ¥3,000 is too much" and brought it down to ¥1,200.
Example 2 — Title and keywords: the human rejected the AI's ideas
For title keywords, the AI suggested "Python / BTC / ETH." I pushed back: "the BTC/ETH abbreviations won't land with beginners," and "the essence of this book isn't the personal angle" — and the AI revised them. Conversely, my own "build from scratch" idea I withdrew myself, feeling it was too derivative, and settled on "personal build." On keywords too, the AI pushed "backtest"; I replied "the search volume is too small," and we ended at "machine learning." It's an accumulation of exchanges like this.
Incidentally, once the direction is set, the AI does the actual work — so part of the back-and-forth for this book happened while I was climbing Mt. Tsukuba, from my phone. Tweaking the chapter outline while taking in the view from the summit: that's about the distance you can work from.
Some of the editing happened at the summit of Mt. Tsukuba. Setting direction takes nothing but a phone.
The content and the making share the same philosophy
The book's argument is "don't rely on flashy prediction; build steadily through design, validation, and iteration." The process of making the book was the same. Don't let AI call the market — but use AI as a maker, to the hilt, for both the system's implementation and the book's writing. Not to guess the future, but as a developer and writer working at your side. The content and the making are built on the same philosophy — and that, I think, is what sets it apart from the usual "written by AI" books.
Note: neither this article nor the book recommends buying or selling any specific crypto asset, and neither is intended as investment advice or solicitation. Any figures shown are results of backtesting / optimization on past data, and do not guarantee future profit or realized returns. Crypto trading carries price-volatility risk. Make your own decisions at your own responsibility.
This is a write-up of how I had Claude Code modernize a personal iOS app I had left untouched for years. I didn't write a single line of code — in fact, I never touched the Mac, or even the PC that Claude Code runs on. I just gave instructions from my phone, and Claude Code did everything headlessly on the Mac over SSH: the code changes, the investigation, the builds, the TestFlight delivery, and even the App Store submission. Here I document what was broken and how it got fixed in a roughly 9-year-old Mastodon viewer (about 7.5 of those years completely abandoned), first released back in 2017.
What you'll learn
How to have Claude Code modernize an old, abandoned iOS app without writing any code yourself
The division of labor (what I asked for vs. what Claude Code asked me to do)
The technical updates that resulted (replacing deprecated APIs, OAuth migration, fixing a Realm device-only crash, and more)
Division of labor: what I asked for, and what Claude Code asked of me
In one sentence, what I first asked Claude Code was: "Take Oyakodon, abandoned for 7.5 years, and fix it without a rewrite so it's ready to ship to the App Store again." We hashed out the actual implementation details through back-and-forth, but the one who opened the editor and wrote the code was Claude Code, not me.
What Claude Code did (headlessly, on the Mac):
The Swift code changes themselves (all of the Before / After below are Claude Code's edits)
Symbolicating crash logs (.ips) with atos to pinpoint the failing locations
Hitting the Mastodon API with curl to isolate behavior
Running xcodebuild archive → altool on the Mac over SSH and uploading to TestFlight
Bumping the build number (CFBundleVersion) and submitting for review on App Store Connect (via the API). The App Store basics (the app record, contracts, baseline info) were already set up from the old-app days, so I never had to log in to App Store Connect anew — Claude Code took it all the way through submission
What I did (only the parts a human can't avoid):
Deciding the policy — "modernize without a rewrite" — and sending instructions from my phone
Touching the TestFlight builds on my own iPhone and reporting anomalies with screenshots. The "crashes right on launch" and "the bottom edge is misaligned" issues below were both found through this hands-on device check. Notably, even hard-to-describe issues like WebView geometry misalignment only took me sending a single screenshot — it was Claude Code that read the image and isolated the cause
In other words, I never once touched the Mac, nor the PC that Claude Code runs on. I never looked at the code, and I never logged in to App Store Connect. The only thing I physically did was tap through the TestFlight builds that arrived on my iPhone and report what looked wrong. Claude Code's role was "investigation, code changes, builds, delivery, submission"; mine was "deciding direction" and being "the eyes and hands that touch the real device and report what's off."
Background: what had "rotted"
The subject is Oyakodon, a personal iOS app. It's a viewer for juggling multiple Mastodon instances side by side, first released in April 2017 — so the app itself is about 9 years old, and I had completely abandoned it for roughly 7.5 years since its last update in October 2018. The modernized build is now live on the App Store (Oyakodon for Mastodon). When I opened it again after all that time, it wouldn't even build — and the cause wasn't just one thing.
iOS SDK side: deprecated APIs had piled up — UILocalNotification, setMinimumBackgroundFetchInterval, UIImageJPEGRepresentation — and private APIs like value(forKey: "statusBar") simply no longer compiled
Mastodon side: the web UI's URL routes changed (e.g. /web/timelines/home → /home), the API was bumped (v1 → v2), and ID types changed
Dependencies: schema changes in Realm (a mobile database), Firebase API revisions, and the review-prompt library Appirater going unmaintained
A vanished external service: the API that returned the instance list (instances.mastodon.xyz) was shut down
Auth flow: password grant (sending username and password directly) was removed, effectively forcing a migration to the Authorization Code flow
In short, it was corroding from five directions at once: SDK, server, libraries, external services, and auth. Fix one and the next would collapse — the textbook state of an abandoned project.
Approach: modernize in place, without a rewrite
The first thing I decided was "no full rewrite." Oyakodon's differentiator is multi-posting to N instances simultaneously, plus cross-instance boosts (reposts). That core was still working fine in the existing Swift code. Throwing away something that works and rewriting from scratch costs more — the cost of reproducing "it works" is the expensive part.
So I chose in-place modernization: keep the app's skeleton, and peel off only the surface corrosion (deprecated APIs, the dead auth flow, old types) one layer at a time. The work was split into Phases 0–8, with each phase bounded by "the build goes green (succeeds)."
Phase-by-phase summary (all done by Claude Code)
Phase
Work
Scale
0
iOS 17 build green / CocoaPods → SPM migration
Deleted 917 files under Pods/, auto-converted the pbxproj
The final scale was 949 files changed, 2,717 lines added, 225,731 lines deleted. The deletion count is extreme because Phase 0 dropped CocoaPods (a dependency manager) and replaced the large library binaries that had been committed to the repo with SPM (Swift Package Manager, Apple's first-party dependency manager).
What changed technically: Before / After
From here, let's look at some of the more characteristic changes Claude Code made, as Before / After.
1. The code was breaking login on every launch
The pre-abandonment code cleared the cache on every launch — and in doing so swept away the areas that hold login state (localStorage and IndexedDB) too. A well-intentioned "let's keep the cache clean" was, as a result, logging the user out on every launch.
// BEFORE: wipes the cache AND login data on every launch
func removeCache() {
    URLCache.shared.removeAllCachedResponses()
    WKWebsiteDataStore.default().removeData(
        ofTypes: [
            WKWebsiteDataTypeDiskCache,
            WKWebsiteDataTypeOfflineWebApplicationCache,
            WKWebsiteDataTypeSessionStorage,
            WKWebsiteDataTypeLocalStorage,       // <- holds login state
            WKWebsiteDataTypeIndexedDBDatabases  // <- same
        ], modifiedSince: Date(timeIntervalSince1970: 0), completionHandler: {})
    // also deletes everything under Library/Caches...
}
The fix was simply "don't touch it." The WKWebView (iOS's web rendering component) session is held by WKWebsiteDataStore, so as long as you don't wipe that, the login persists.
2. Mastodon IDs should be String, not Int
The old code held Status (post) IDs as Int, parsing them via NSString. Mastodon IDs keep growing in digit count over time, so treating them as Int risks overflow. Keeping them as plain strings was the right answer.
// BEFORE: parse via NSString (huge IDs risk overflow)
public class Status { public var id: Int! }

if let statusId = (item["id"] as? NSString)?.integerValue {
    status.id = statusId
}
let body = ["since_id": "\(sinceId)"]  // converted to a string every time
// AFTER: pull it straight out of JSON as a String
public class Status { public var id: String! }

if let statusId = item["id"] as? String {
    status.id = statusId
}
if !sinceId.isEmpty { body["since_id"] = sinceId }  // don't send if empty
Stringifying the ID makes ordering a string comparison, so I implemented a comparison helper with the rule "more digits = newer; same digit count = lexicographic," backed by 16 unit tests.
3. OAuth: from password grant to the Authorization Code flow
Because Mastodon removed password grant (exchanging username and password directly for a token), I had to migrate to the Authorization Code flow, which receives an authorization code via the browser.
// BEFORE: password grant (removed)
static func fetchAccessToken(addr: String, clientId: String, clientSecret: String,
                            username: String, password: String, ...) {
    let body = [
        "grant_type": "password",  // <- the removed flow
        "username":   username,
        "password":   password,
        ...
    ]
}
// AFTER: Authorization Code flow (send only the code obtained in the WebView)
static func fetchAccessToken(addr: String, clientId: String, clientSecret: String,
                            code: String, ...) {
    let body = [
        "grant_type":   "authorization_code",
        "redirect_uri": "oyakodon://oauth",
        "code":         code,
        ...
    ]
}
A design choice: instead of Apple's recommended ASWebAuthenticationSession (an OS-provided, auth-dedicated browser), I complete OAuth inside the app's existing WKWebView. The reason is UX. ASWebAuthenticationSession uses a browser session independent of the WKWebView used for the timeline, which would force a double login — "once for the timeline, once more for OAuth." By catching the navigation to oyakodon://oauth?code=... in the existing WebView's navigation delegate (the hook that watches page transitions), you stay in the same session and log in just once.
4. From StoreKit 1 to StoreKit 2 (250 lines → 79)
The IAP (in-app purchase) code was a StoreKit 1 implementation that hand-managed state with the Observer pattern plus delegates. Replacing it with StoreKit 2's async/await base made the state flags and error counters disappear entirely — 250 lines became 79.
// BEFORE: Observer pattern, singleton, delegates (~250 lines)
class PurchaseManager: NSObject, SKPaymentTransactionObserver {
    var delegate: PurchaseManagerDelegate?
    func startWithProduct(_ product: SKProduct) {
        if SKPaymentQueue.canMakePayments() == false { ... }
        // flag management, error counters...
        SKPaymentQueue.default().add(payment)  // result is left to the Observer
    }
    func paymentQueue(_ queue: SKPaymentQueue, updatedTransactions: ...) {
        // switch over .purchased / .failed / .restored
    }
}
// AFTER: async/await, @MainActor (~79 lines)
@MainActor final class IAPManager {
    static let shared = IAPManager()

    func purchase(productID: String) async throws -> Bool {
        let products = try await Product.products(for: [productID])
        guard let product = products.first else { return false }
        let result = try await product.purchase()
        switch result {
        case .success(let v):                 return await handleVerification(v)
        case .userCancelled, .pending:        return false
        @unknown default:                     return false
        }
    }

    func restore() async throws {
        try await AppStore.sync()
    }
}
I also moved background notifications from the old performFetchWithCompletionHandler to BGTaskScheduler (the iOS 13+ background-task API), and the Share Extension from MobileCoreServices's C constants to UniformTypeIdentifiers' UTType. These are all "replace an old API with a new one one-to-one" jobs, and raising the minimum OS to iOS 17 let me delete every if #available(iOS 10.0, *) branch.
Three bugs that only surfaced on a real device via TestFlight
This is the part I most want to get across. Even with the build passing and everything working perfectly in the simulator, three bugs that crashed or misaligned appeared the moment I put a TestFlight build on a real device (iPhone). The flow was: I touched the device and reported the anomaly, and Claude Code symbolicated the .ips crash log with atos to pinpoint the cause. Every one of these would have first surfaced on a user's device after release if I'd only watched the simulator.
(1) Realm crashes immediately on device launch (missing embed)
RealmSwift added via SPM is type: .dynamic — that is, always a dynamic framework (loaded at runtime). But when Phase 0 auto-converted the pbxproj (Xcode's project settings file), it only set up the framework "link" and never added the "embed" (the Embed Frameworks phase).
As a result, it works in the simulator (which embeds it via another path) but crashes on a real device right after launch with dyld: Library not loaded: @rpath/RealmSwift.framework.
A quick way to tell: a healthy IPA (the iOS app package) bundles RealmSwift.framework and comes out to about 12MB. If it's only 2.5MB, the embed is missing. Just checking the IPA size before uploading tells you instantly.
(2) The trap of ignoring Realm's Configuration
The second one is also Realm. I had set schemaVersion and migrationBlock (the schema-migration handler) on Realm.Configuration.defaultConfiguration, yet it still crashed on launch.
The cause was opening the DB with Realm(fileURL:). That initializer ignoresdefaultConfiguration. So the existing DB's schema version (2) and the new default (0), which never picked up my settings, were mismatched.
// NG: schemaVersion / migrationBlock on defaultConfiguration are ignored
let realm = try Realm(fileURL: dbURL)

// OK: pass the Configuration explicitly
var config = Realm.Configuration.defaultConfiguration
config.fileURL = dbURL
let realm = try Realm(configuration: config)
(3) WebView bottom-edge misalignment (took three fixes to truly resolve)
The third is a misalignment where, at the bottom of the screen, the WebView slightly overlaps the toolbar or leaves a gap. I fixed this three times in total — in 2.7.2 build 2, 2.7.3 build 1, and 2.7.3 build 2 (shipping to TestFlight and checking on the device each time). The first two were symptomatic treatments; the root cause was "three parties fighting over the geometry (position and size)."
It's hard to convey in words exactly "how many points it overlaps," but all I did was screenshot the device screen and send it. Claude Code read the amount and direction of the misalignment from the image and narrowed down the cause. This was a moment where a problem that would have taken many round-trips with text alone moved forward with a single image. Here are the actual before / after device screenshots I sent.
Before: the bottom edge overlaps the toolbarAfter: pinning all four edges resolves itThe before / after I shot on the device and sent to Claude Code. It read the amount of misalignment from these images.
Storyboard Auto Layout: views with translatesAutoresizingMaskIntoConstraints = false snap back to their constraint values on every layout pass
Manual frame math: the menu-bar show/hide logic used the deprecated statusBarFrame and ignored the 34pt bottom safe area (the home-indicator region)
Resize handling: it snapshotted the container height at that instant, so it couldn't follow changes after the toolbar's open/close animation finished
These three kept overwriting the frame values every time, so wherever you fixed it, another piece of logic would roll it back. The real fix was "drop the manual frame math and resize handling, and pin the WebView's four edges to the container with Auto Layout." Pin it once, and the layout follows automatically from then on.
// AFTER: pin all four edges with Auto Layout -> follows automatically afterward
let webView = self.webViewController.webView
webView.translatesAutoresizingMaskIntoConstraints = false
NSLayoutConstraint.activate([
    webView.topAnchor.constraint(equalTo: webContainerView.topAnchor),
    webView.bottomAnchor.constraint(equalTo: webContainerView.bottomAnchor),
    webView.leadingAnchor.constraint(equalTo: webContainerView.leadingAnchor),
    webView.trailingAnchor.constraint(equalTo: webContainerView.trailingAnchor),
])
// removed the manual resizeWebView()
Notes on design decisions
Don't rewrite: the differentiators (multi-posting, cross-instance boosts) were working in the existing code, so keeping them and only fixing the surface was the surer bet.
CocoaPods → SPM: the immediate trigger was a build-environment constraint, but the bigger side effect was wiping out 50MB+ of binaries that had been committed to the repo.
Externalizing config: Mastodon's web UI routes will keep changing. Splitting the URL path table / CSS / JS into JSON and files makes it easier to follow the next change without rebuilding the app itself. It's also aimed at sharing the spec when I eventually write an Android version.
App Store review risk: an app that merely displays a site in a WebView can be rejected under guideline 4.2 (minimum functionality). The native layers — multi-posting, OAuth, notifications, purchases — are what form that line of defense.
In the end, 2.7.2 is released, and I got 2.7.3 to a state I could submit for App Store review. The actual work took about a week.
FAQ
Q. Did you write the code yourself?
A. No — not a single line, and I never even looked at the code. I just decided the policy ("modernize without a rewrite") and instructed from my phone; Claude Code did the code changes, investigation, builds, TestFlight delivery, and App Store submission headlessly on the Mac over SSH. I never touched the Mac or the PC Claude Code runs on. The only thing I physically did was tap through the TestFlight builds that arrived on my iPhone and report anomalies. The App Store Connect submission was also done by Claude Code via the API (the App Store basics were already set up from the old-app days, so no new login was needed).
Q. Why does it crash on a real device when it works in the simulator?
A. Because the parts the simulator stands in for — whether dynamic frameworks are embedded, code signing, the device-specific safe area — are exposed on a real device. The Realm crash here was exactly that, so before release you should always deliver to a real device via TestFlight and confirm it launches.
Q. Wouldn't rewriting the old app be faster?
A. If the differentiators still work, I don't recommend a rewrite, because reproducing "it works" is costly. Conversely, if the core itself is outdated or broken, a rewrite can be faster. The deciding factor is "is what's broken the inside, or the surface?"
Q. Is completing OAuth inside a WebView safe?
A. Security-wise, ASWebAuthenticationSession is preferable. Here I prioritized the UX of avoiding a double login and kept it inside WKWebView, but for apps where you don't control the authorization server, consider Apple's recommended approach.
Note: the code in this article is simplified from what actually ran on the Xcode / iOS SDK / libraries at the time of writing (June 2026). If versions change, it may not work as-is. If something doesn't work, let me know in the comments. Environment-specific values like the Bundle ID have been replaced with placeholders.
Wrap-up
Even a roughly 9-year-old iOS app (about 7.5 of those years abandoned) can be fixed without a rewrite if what's broken is the "surface." This time I wrote no code and looked at none, never touched the Mac, and stuck to setting direction and checking on my own iPhone, leaving the code changes, builds, TestFlight delivery, and App Store submission to Claude Code. The hard parts were the Realm issues and the WebView geometry — things that build fine but only break on a real device. Don't trust the simulator too much; delivering to a real device via TestFlight to verify is the shortcut.
If this article helped, I'd be glad if you shared it on X (Twitter).
A build log for setting up SD1.5 + ControlNet on a GTX 1660 SUPER (6 GB VRAM). The three real roadblocks were not VRAM shortage but: RAM spiking to ~26 GB causing OOM, fp16 producing all-black NaN images, and a forced math SDPA path causing a 3.2× slowdown. A fourth surprise — every benchmark had been measured while spilling to host RAM — appeared later. Full breakdown from cause to fix.
What This Article Covers
An SD1.5 + ControlNet configuration that works on a 6 GB VRAM GPU
The fp16 NaN issue on GTX 16xx (TU116) and how to work around it
Why sequential_cpu_offload eats RAM instead of VRAM
Final benchmarks: Hyper-SD15 1-step ~5 s/image, full 25-step ~1 min/image
Background: SDXL ControlNet Was Abandoned in 1 Hour 13 Minutes
The original plan was to implement ControlNet on an existing SDXL-based environment. On 2026-04-30 at 21:40 the implementation finished. By 22:53 it had been reverted. One hour, thirteen minutes.
RAM was the cause. With SDXL and enable_sequential_cpu_offload, VRAM peaks at ~4 GB — but the entire model lives in RAM. Adding ControlNet (fp32, ~5 GB) on top:
Configuration
VRAM peak
RAM resident
Result
SDXL fp32 + FaceID
~4 GB
~21 GB
✅ (24 GB system)
+ ControlNet added
~4 GB (unchanged)
~26 GB ❌
OOM
VRAM was fine. ControlNet's cost shows up on the RAM side. The confusion — "VRAM is within limits, so why OOM?" — only resolves once you understand how sequential_cpu_offload works.
How sequential_cpu_offload Works
diffusers' enable_sequential_cpu_offload iterates through ~700 UNet submodules, transferring each to VRAM → running inference → moving it back to RAM, once per step. The full model lives in RAM throughout. There are 700 CPU↔GPU round trips per step, with Python GIL pinning a single core at 100%.
SD1.5 weighs ~4 GB (fp32) — it fits in 6 GB VRAM, making sequential_cpu_offload unnecessary. That was the motivation for building a separate SD1.5 environment.
Three Problems That Blocked Progress
① fp16 Produces All-Black NaN Images (Known GTX 16xx Issue)
Five configurations were benchmarked:
Configuration
Step time
Output
T1: SD1.5 fp16, no CN, math SDPA
15.8 s/step
All-black 1224 bytes (NaN)
T3: + ControlNet ×1, math SDPA
22.6 s/step
NaN
T4: + flash + mem-efficient SDPA
7.1 s/step
NaN (faster, but still broken)
Switch to fp32 (default SDPA)
see below
✅ Clean output
Changing the SDPA kernel did not fix the NaN. The root cause: the GTX 1660 SUPER (TU116) has no Tensor Cores, causing underflow/overflow in fp16 softmax inside the attention layers. This is the same issue behind AUTOMATIC1111's --no-half flag for GTX 16xx cards. Switching to fp32 fixed it immediately.
② Forced math SDPA Was Causing a 3.2× Slowdown
The gap between T3 (22.6 s/step) and T4 (7.1 s/step) traced back to legacy code copied from another environment:
# Carried over from another env (written as an fp16 NaN workaround)
torch.backends.cuda.enable_flash_sdp(False)
torch.backends.cuda.enable_mem_efficient_sdp(False)
torch.backends.cuda.enable_math_sdp(True)
Removing these lines and letting PyTorch auto-select the SDPA kernel gives the 3.2× improvement. Note: flash SDPA requires fp16/bf16, so after switching to fp32 the math kernel is used anyway — the correct combination is "remove the forced lines + use fp32."
③ All Benchmarks Were Measured While Spilling (Discovered Later)
After the environment was set up, adding vram_peak_mb metadata to generated images revealed that fp32 + 1 ControlNet peaks at 6,726 MB VRAM. The WSL2 effective limit on this card is ~6,100 MB.
Everything had been spilling to host RAM. Every earlier number (13.7 s/step, full 25-step in 5 min 55 s) was measured in a spill-to-RAM state.
The fix: enable_model_cpu_offload (model-granularity, ~5–10 CPU↔GPU swaps per step):
Configuration
--offload none (spilling)
--offload model (current default)
Speedup
Full 25-step + 1 CN
584.7 s / 6,726 MB VRAM
61.5 s / 5,298 MB VRAM
9.5×
Hyper-SD15 4-step + 1 CN
62.9 s / 6,680 MB VRAM
11.1 s / 5,146 MB VRAM
5.7×
Hyper-SD15 1-step
32.4 s / 6,680 MB VRAM
4.9 s / 5,106 MB VRAM
6.6×
Multi-CN (×2) 25-step
884.6 s / 8,124 MB VRAM
680.1 s / 6,694 MB VRAM
1.3× (still spilling)
With 1 CN, VRAM drops to 5.1–5.3 GB — no spill — yielding the 9.5× improvement. Multi-CN (×2) still peaks at 6.7 GB even with --offload model, so the gain is limited.
Low-Step Distillation for SD1.5: What Replaces SDXL Lightning?
SDXL Lightning has no SD1.5 equivalent — ByteDance only released it for SDXL. SD1.5 alternatives:
LCM-LoRA (--lcm): 4-step, ~10 s/image
Hyper-SD15 CFG-distilled (--hyper {1,2,4,8}): 1-step, ~5 s. Negative prompt disabled.
Hyper-SD15 CFG-preserved (--hyper-cfg {8,12}): 8-step, ~4.5 min. Negative prompt enabled, less over-saturation.
For pose exploration, --hyper 1 (5 s/image) lets you iterate quickly. For portrait finishing, --hyper-cfg 8 (negative prompt active) is more controllable.
Final Role Split Between the Two Environments
SD1.5 environment
SDXL environment
Primary use
Pose & composition exploration
Final output & FaceID portrait
Speed (full 25-step)
~1 min/image (61.5 s measured)
~16 min/image
Speed (low-step distillation)
Hyper 1-step ~5 s
Lightning 8-step ~6–7 min
Resolution
512×768 (native)
1280×720 / 832×1216
ControlNet
OpenPose / Canny / Depth ✅
❌ (dropped due to RAM limit)
Recommended workflow: use SD1.5 with --hyper 1 (5 s/image) to rapidly explore poses and compositions, then pass the chosen reference image to the SDXL environment for final output. SD1.5 OpenPose skeleton maps are not directly usable by SDXL ControlNet (different latent spaces), but the original reference image can be passed as IP-Adapter input as a bridge.
FAQ
Q. Can I use fp16 on the GTX 1660 SUPER?
A. fp32 only for now. TU116 has no Tensor Cores, causing underflow/overflow in fp16 softmax inside the attention layers. This is the same root cause as AUTOMATIC1111's --no-half and ComfyUI's --force-fp32. RTX 3060 and later (Ampere) support fp16 and can reach 1–2 s/step with flash SDPA.
Q. Is there a way to add ControlNet to the SDXL environment?
A. In a txt2img + ControlNet only setup (no FaceID), RAM usage stays around ~19 GB and it works. Running FaceID and ControlNet simultaneously pushes RAM to ~26 GB, which makes distributing the work to SD1.5 the more practical choice.
Q. How slow is Multi-ControlNet (×2)?
A. Even with --offload model, VRAM still peaks at 6.7 GB with spilling, so it takes ~11 min/image. The improvement is limited compared to 1 CN (~1 min) because the spill is not fully resolved.
※ Steps and numbers in this article were verified in a 2026-May environment (diffusers 0.38, GTX 1660 SUPER, WSL2 + Ubuntu 22.04). Behavior may differ with different library or driver versions. If something does not work, please let me know in the comments.
Summary
I set up SD1.5 + ControlNet on a GTX 1660 SUPER (6 GB VRAM, 24 GB RAM). After working through three pitfalls — fp16 NaN, forced math SDPA slowdown, and VRAM spill causing misleading benchmarks — the final configuration delivers Hyper-SD15 1-step in ~5 s/image and full 25-step in ~1 min/image. Pairing this with the SDXL environment (16 min/image) for final output makes pose exploration much faster.
If this article was useful, sharing it on X would be appreciated.
My App
I built an iOS reading-log app called
My Book Store,
available on the App Store. If you want a simple way to manage your bookshelf, give it a try.
This is a log of replacing my home WiFi router after dealing with ~30 connected devices and repeated monthly hangups. I'll cover why the old router kept crashing, how to read WiFi generation differences, the real meaning of those "Mbps" figures, and my final choice between two top-tier models. If your router is getting flaky as device count grows, I hope this helps.
What You'll Learn
Why routers hang up when connection count grows (and why rated capacity isn't the problem)
WiFi 5 / 6 / 6E / 7 differences and how to choose the right generation
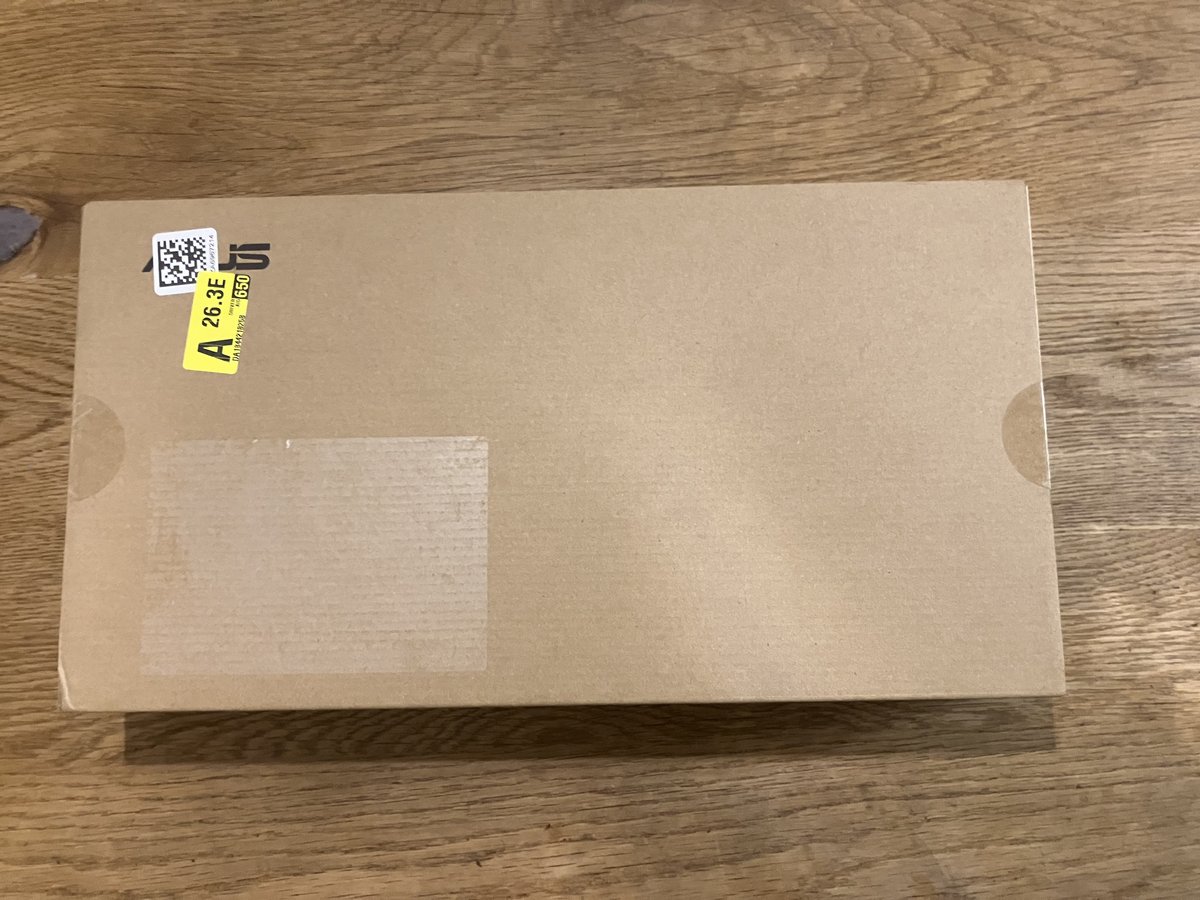
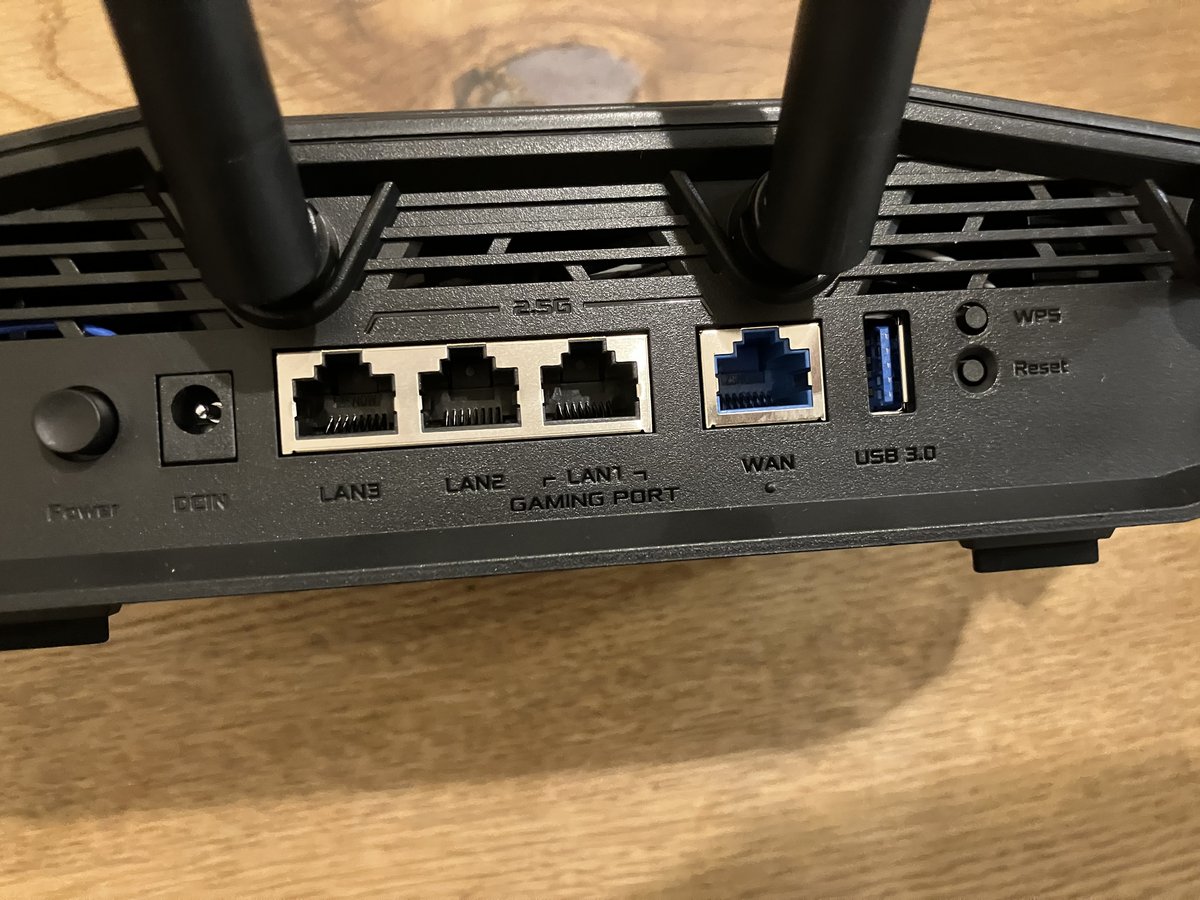
Practical comparison: ASUS TUF Gaming BE9400 vs Buffalo WXR-11000XE12
Repeated Hangups Finally Pushed Me to Act
I had been running a TP-Link Archer A10 purchased in 2018 — about six years. Recently it started hanging several times a month, killing all connectivity.
What made it worse: during a hang, even the router's admin panel at 192.168.x.x was unreachable. The only fix was physically pulling the power cable. With firmware updates stopped in 2024, there was no path to improvement — that's when I decided it was time to replace it.
I Had ~30 Devices Without Realizing It
The first thing I did was count connected devices:
Phones, PCs, tablets: 4 family members — I run separate work, personal, and development machines; the kids each have a school PC, personal PC, and smartphone
Development devices: Claude Code PC, GPU processing PC, Mac, several Raspberry Pis, iPhone and Android for app testing
Home appliances and IoT: TV, recorder, AV receiver, smart scale, smart speakers, SwitchBot smart bulb, thermometer, and turtle tank heater…
The total came out to ~30. The kids had accumulated tablets and gaming devices without me noticing.
Why Did the Archer A10 Last This Long?
The Archer A10's rated limit is 48 simultaneous connections, so raw capacity wasn't the direct cause.
The real problem is processing power running dry:
A 2018 entry-level CPU/RAM isn't designed to steadily handle 30 concurrent devices
Unpatched memory leaks accumulate with no firmware updates
Repeated monthly hangs fit the textbook pattern of connection tables being exhausted
The bottom line: old hardware can't keep up with modern usage patterns, regardless of the rated connection count.
A Quick WiFi Generation Guide
Generation
Standard
Bands
Multi-device performance
WiFi 5
802.11ac
2.4 + 5 GHz
△ Struggles with many devices
WiFi 6
802.11ax
2.4 + 5 GHz
◎ OFDMA — major improvement
WiFi 6E
802.11ax
2.4 + 5 + 6 GHz
◎ 6 GHz adds interference-free band (weaker through walls)
WiFi 7
802.11be
2.4 + 5 + 6 GHz
◎ MLO (multi-link operation) is the headline feature
For my setup, the meaningful upgrade is WiFi 5 → WiFi 6. OFDMA dramatically improves concurrent transmission efficiency. WiFi 6E adds the 6 GHz band for less interference, though it attenuates more through walls.
Those "Mbps" Figures Aren't Per-Device Speed
Router specs lead with numbers like "AXE11000" or "11,000 Mbps." These are total theoretical throughput across all bands combined — not what any single device experiences.
For high-device-count environments, focus on total capacity, not peak speed. The gap between my old Archer A10 (~2,600 Mbps) and the candidates (~9,000–11,000 Mbps) represents a completely different order of processing headroom.
Down to Two Finalists
My requirements narrowed the field quickly:
WiFi 6 or above (OFDMA required)
Sufficient capacity for 30+ concurrent connections
① WiFi 7 + AiMesh is the more flexible long-term combination
MLO — WiFi 7's headline feature — requires client devices to also be WiFi 7, so I won't see that benefit right away. But AiMesh gives me access to ASUS's broad lineup of satellite nodes for future expansion. EasyMesh is an open standard in theory, but compatible devices are limited in practice.
② Release date gap means more firmware runway
The WXR-11000XE12 launched in April 2023; the TUF BE9400 launched in December 2025 — a 2.5-year gap. After getting burned by abandoned firmware on the Archer A10, I put real weight on how many years of support are likely remaining.
③ The ¥10,000 price difference is hard to justify the other way
At ~¥40,000 on Amazon, the WXR-11000XE12's advantages — 4×4 MIMO across all three bands, 10 Gbps wired port — are real. But my home runs entirely on WiFi (no wired LAN runs to individual rooms), and my current devices are WiFi 5 and 6. That spec headroom is oversized for this environment, and ¥10,000 extra for it didn't add up.
Routers That Didn't Make the Cut
Every model I seriously considered, and why each was dropped:
Model
WiFi
Total capacity
Mesh
Price
Why dropped
ASUS RT-BE92U
WiFi 7
~9,700 Mbps
AiMesh
~¥37,600
Same generation and feature set as the TUF BE9400, but ~¥8,000 more. 10 Gbps WAN is overkill on a 1 Gbps fiber line.
ASUS RT-AX86U Pro/J
WiFi 6
~5,700 Mbps
AiMesh
~¥38,700
Priced close to WiFi 7 options but one generation behind. Hard to justify.
TP-Link Deco XE75 Pro
WiFi 6E
~5,400 Mbps
OneMesh
~¥15,800
Attractive price, but total capacity is less than half the other finalists — not enough headroom for ~30 devices.
TP-Link Archer A10 (current)
WiFi 5
~2,500 Mbps
None
—
Firmware updates stopped, processing limit reached. The router being replaced.
Deployment Plan: Start with One Unit
My apartment is a single floor with four rooms. There's a LAN jack built into the central hallway closet, which lets me position the router near the middle of the floor — a real advantage.
The weak spot is my office at the far end with no wired LAN run. I'll start with one TUF Gaming BE9400 and add an AiMesh-compatible node near the office if signal turns out to be insufficient (wireless backhaul is supported).
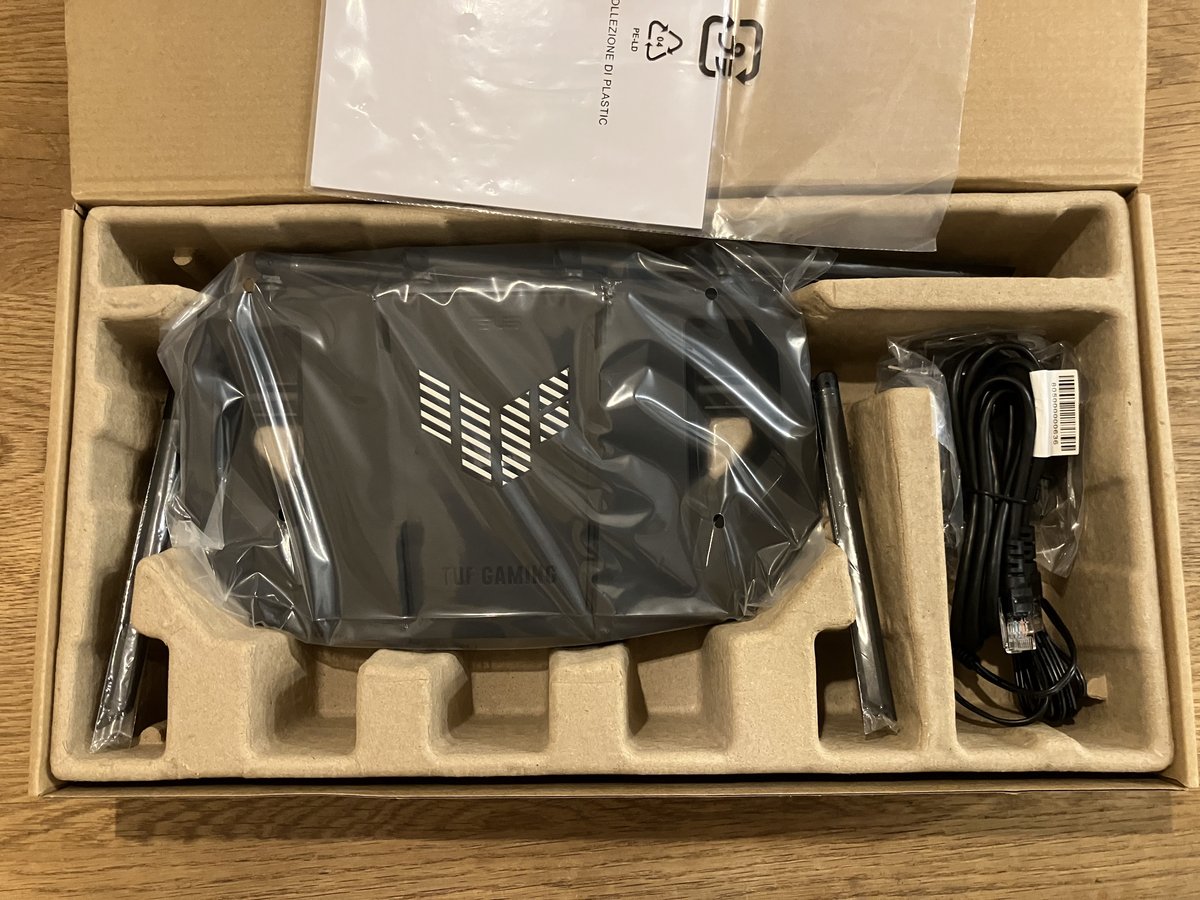
The packaging — no logo, no graphics. Minimalism taken to the extreme.Unboxing reveals a stark contrast — a crab-like body sporting 6 antennas.The rear panel features a dedicated "Gaming port" LAN port — devices connected here get priority packet handling.
FAQ
Q. Is WiFi 7 worth buying today?
A. It depends on pricing. I chose the TUF Gaming BE9400 because it was cheaper than comparable WiFi 6E options — not because of WiFi 7's MLO features specifically. MLO still requires WiFi 7 client devices to deliver its benefits. If a WiFi 7 router is priced similarly to a WiFi 6E model, the newer generation is worth it for the longer firmware support runway alone.
Q. Should I actively use the 6 GHz band on WiFi 6E/7?
A. The 6 GHz band has less interference but attenuates more through walls. For cross-room use, 5 GHz is often more stable. Leave band steering to the router's auto settings.
Q. Can I trust the rated connection count?
A. The rated count is an association limit, not a "stable throughput" guarantee. Entry-level hardware from older generations hits CPU/RAM limits well before the connection count ceiling.
Q. When should I add a mesh extender?
A. If one specific room consistently shows speed drops or disconnects after the main router is installed, that's the signal. Start with one unit and extend only where needed.
※ Prices and specs in this post are current as of May 2026. Please verify before purchasing.
Summary
When a router starts acting up as device count grows, the fix isn't chasing the highest connection-count spec — it's upgrading to a generation with more processing headroom. OFDMA support matters more than peak Mbps for dense home networks.
WiFi 7 is compelling but requires client-side hardware to deliver its headline features. That said, if a WiFi 7 router is priced at or below WiFi 6E alternatives, the newer generation wins on firmware longevity alone.
If this post helped, share it on X (Twitter) — it means a lot.
Routers Mentioned
ASUS TUF Gaming BE9400
— WiFi 7, AiMesh-compatible, released Dec 2025. Best value when a WiFi 7 router undercuts the WiFi 6E competition on price.
Buffalo WXR-11000XE12
— WiFi 6E, 12 streams (4×4 per band), 10 Gbps wired. Strong multi-device handling for power users.
App by the Author
I built an iOS reading tracker app called
My Bookstore,
available on the App Store. Great for keeping a simple reading list.
This is a build log for engineers who want to generate videos programmatically on a Linux server. Using the open-source video rendering engine HyperFrames, I set up an environment that converts HTML/CSS/GSAP animations into MP4 files via headless Chrome and FFmpeg — on an Ubuntu server without sudo privileges. This covers everything, including the fix for the hardest part: Japanese font tofu (text rendering as □□□).
What You Can Do
Convert HTML/CSS/GSAP animations into MP4 videos automatically
Set up a video generation environment on a Linux server without GPU or Docker
Understand and fix the Japanese font tofu problem (text showing as □□□)
Tools Used
HyperFrames — HTML/CSS to MP4 rendering engine (OSS, Apache 2.0)
nvm — Node.js version manager (installs without sudo)
Node.js 22 — runtime for HyperFrames (v22+ required)
FFmpeg — video encoder (installed via static binary, no sudo)
I came across HyperFrames on X (Twitter). A post describing it as an OSS tool that converts HTML to video without GPU or Docker spread widely among engineers. It looked like a perfect fit for my use case, so I dug in.
I needed a way to generate MP4 videos automatically from other scripts over SSH — without occupying a GPU and without Docker. HyperFrames fit the bill: CPU rendering, standard Web technologies, and a regular Linux user environment.
Environment: Ubuntu 22.04, no sudo (regular user).
Steps
1. Install Node.js 22+ via nvm
HyperFrames requires Node.js 22 or higher. Most Ubuntu environments ship an outdated Node.js via apt, so we install via nvm at the user level.
Common pitfall: nvm installs node under ~/.nvm/versions/node/v22.x.x/bin/. When scripts run over SSH, ~/.bashrc is not sourced, so this path is missing from PATH. Add the following to the top of any SSH-invoked script:
HyperFrames uses headless Chrome for frame capture. The following command downloads it automatically.
$ hyperframes browser ensure
Make sure node and ffmpeg are in PATH before running. Verify with which node && which ffmpeg.
5. Fix Japanese Font Tofu (the Hardest Part)
With font-family: 'Noto Sans JP' in the HTML template, Japanese text renders as tofu (□□□). The HyperFrames log says "Fetched 1116 font face(s) for Noto Sans JP from Google Fonts" — yet the text is still broken.
Root Cause
Google Fonts delivers Noto Sans JP split across Unicode range subsets. HyperFrames only cached the Latin subset (81 KB). The CJK subset containing Japanese glyphs (4–5 MB per weight) was never downloaded.
Since headless Chrome reads system fonts directly, the fix is to install the full TTF into the system font directory.
Fix
Use curl to download the TTF directly. Browser User-Agent spoofing is required — without it, Google Fonts returns a woff2 subset URL instead of the full TTF, and the tofu problem persists.
$ mkdir -p ~/.local/share/fonts

# Spoof User-Agent to get the full TTF (required)
$ curl -L -A 'Mozilla/5.0 (X11; Linux x86_64)' \
    'https://fonts.gstatic.com/s/notosansjp/v56/-F6ofjtqLzI2JPCgQBnw7HFowAA.ttf' \
    -o ~/.local/share/fonts/NotoSansJP-Regular.ttf

# Rebuild font cache
$ fc-cache -f ~/.local/share/fonts/

# Verify
$ fc-list | grep "Noto Sans JP"
If fc-list shows NotoSansJP, it worked. Note: the version number in the URL (v56) may change. For a URL-independent alternative, download the full zip from the Google Fonts page, extract to ~/.local/share/fonts/, and run fc-cache -f.
Before / After
Here are the actual videos before and after the fix.
Before — Japanese text renders as □□□ (tofu)After — Japanese text renders correctly
6. Python Wrapper Script (Optional)
If you need to call HyperFrames over SSH from other scripts, a thin Python wrapper helps. Key design points:
Accept --prompt "text" and generate the HTML composition internally (isolates callers from HyperFrames' HTML schema)
Support style selection via arguments (fade / slide / motion)
Use fcntl.flock for mutual exclusion when called from multiple processes
The caller only needs to know "SSH one command, get back an MP4 file" — internal HTML template changes don't require updating callers.
Completed System
Caller Script (SSH)
▼ --prompt "text" --output video.mp4
Python Wrapper (HTML gen + lock)
▼
HyperFrames (Node.js + Chrome + FFmpeg)
▼
MP4 Video (720p / 30fps)
No daemon, command execution only. One SSH call returns a video file.
FAQ
Q. I get nvm: command not found
A. This happens when ~/.bashrc is not sourced during SSH execution. Add source "$HOME/.nvm/nvm.sh" to the top of your script.
Q. hyperframes browser ensure fails
A. Check that both node and ffmpeg are in PATH. Run which node && which ffmpeg — both paths should appear.
Q. Chinese or Korean text is also tofu
A. Same root cause. Install the full TTF for that font into ~/.local/share/fonts/ and run fc-cache -f.
Q. The video is black
A. Chrome may be capturing frames before the first render. Increase the delay in your composition config or adjust when CSS animations start.
Q. Does Node.js 20 work?
A. Node.js 22+ is the official requirement. Switch with nvm install 22 && nvm use 22.
※ The steps and commands in this post were verified at the time of writing (May 2026). They may break with library or OS updates. If something doesn't work, let me know in the comments.
Summary
I set up HyperFrames on a sudo-less Ubuntu server. The biggest pain point was Japanese font tofu — caused by Google Fonts' subset delivery and headless Chrome reading system fonts directly. Downloading the full TTF with a browser User-Agent and installing it to the system font directory fixes it cleanly.
If this post helped, share it on X (Twitter) — much appreciated.
A Promo Video Built with HyperFrames
To put it all together, I made a 30-second promo video for this blog — ON THE HAND — using HyperFrames. It combines past post images with fade transitions and text captions. Japanese text renders correctly after the font fix.
ON THE HAND blog promo video (generated with HyperFrames, 30 sec)
App by the Author
I built an iOS reading tracker app called
My Bookstore,
available on the App Store. Great for keeping a simple reading list.
This article is for developers looking to add X (formerly Twitter) auto-posting to their personal blog or bot. As of May 2026, X API has no free tier, and there are two authentication traps that aren't well-documented. Here's everything I ran into while connecting my own system — including the tweepy v1.1 / v2 split that's still unavoidable today.
What you'll be able to do
Auto-post to X with text and images using Python + tweepy
Understand the 2026 X API pricing (no free tier, pay-per-use)
An X Developer Portal account (credit card required)
The state of X API in 2026
Short version: there is no free tier.
Older tutorials confidently say "Free tier works fine for personal bots." That's no longer true. When you open X Developer Portal today, the only option is the Basic plan with pay-per-use billing.
Pricing
$0.20 per tweet with a URL (tweets without URLs are billed differently — cheaper)
The monthly Spend Cap is unlimited by default — if you don't set one, charges can accumulate without any automatic ceiling
Hit the cap and API calls are blocked until the next billing cycle
Set a Spend Cap before you start. Without one, there's no automatic stop — charges just keep running.
After setting a cap, I hit it on my 4th test tweet:
Your enrolled account has reached its billing cycle spend cap.
API requests will be blocked until the next cycle begins on 2026-06-10.
Go to Developer Console → Billing → Spend limit to set or adjust your cap. You can raise it immediately if you hit it.
Gotcha 1: The 401 trap (regenerate your token after initial setup)
I created the app with "Read and Write" permissions from the start — no permission change involved. Yet every API call returned 401. The token showed as valid in Developer Portal, but requests kept getting rejected.
The fix: Regenerate your Access Token & Secret once after initial setup. The root cause isn't entirely clear, but a fresh token resolved it immediately.
Fix
Developer Portal → App → Keys and tokens
Click "Regenerate" on Access Token & Secret
Update your code with the new token
If you're getting 401 right after setup, regenerating the token is the quickest thing to try. It's not documented prominently anywhere.
Gotcha 2: The 402 trap (no credit balance)
After regenerating the token, the next call returned 402:
Your enrolled account does not have any credits to fulfill this request.
Since there's no free tier, a zero credit balance blocks requests. Add a small top-up in Developer Console and it resolves immediately.
Implementation: tweepy v1.1 vs v2
To post a tweet with an image right now, you need both versions of the tweepy API simultaneously.
Tweet posting: tweepy v2 Client (OAuth 2.0)
Image upload: tweepy v1.1 API (v2 doesn't have media upload)
Trying to do everything with v2 alone will fail — there's no media upload endpoint in the v2 API yet. Upload with v1.1, grab the media_id, pass it to v2 create_tweet.
Cost estimate
At $0.20/tweet with URL:
3 posts/week × 4 weeks = 12/month → ~$2.40/month
3 posts/week × 5 weeks = 15/month → ~$3.00/month
$3/month isn't a lot in absolute terms, but think about what you're actually getting. X auto-posting doesn't generate new content, and it doesn't unlock any extra API features. It's purely a distribution cost — paying to push your existing posts to a wider audience.
That math works out if the X traffic converts to something: affiliate clicks, ad impressions, newsletter signups. If your blog isn't monetized yet, you're essentially paying $3/month indefinitely with no return. Before setting this up, ask whether you have a revenue path that X traffic could feed into.
If you're posting daily, costs jump to $20-30/month — worth factoring in before you commit.
Related items
Raspberry Pi 5 4GB (check on Amazon) — if you want your posting bot running 24/7 on low power
FAQ
Q. Is there any way to use X API for free?
A. As of May 2026, Free tier doesn't exist. You'll need a credit card and a small top-up. Keeping post volume low (under 20/month) keeps costs under $5.
Q. My 401 error won't go away
A. If you're getting 401 after initial setup, regenerate your Access Token & Secret: Developer Portal → App → Keys and tokens → Regenerate. This works regardless of whether you changed app permissions.
Q. Do tweets without images also cost $0.20?
A. Yes — image presence doesn't affect the price. What matters is whether the tweet contains a URL. Tweets without a URL are billed at a lower rate than URL-bearing tweets ($0.20/each).
Q. Can I use the requests library instead of tweepy?
A. Yes, you can use raw requests with OAuth 1.0a. tweepy is recommended because it handles auth boilerplate and is actively maintained.
※ The steps and code in this article were verified in May 2026. X API pricing and tweepy's behavior may change. If something breaks, let me know in the comments.
Summary
X API in 2026 is pay-to-play. The "free bot" era is over. But for a personal blog announcing a few posts per week, $3/month is manageable. The two auth traps (token invalidation after permission change, zero-credit 402) aren't well-documented, so hopefully this saves you the 30 minutes I lost. And yes, you still need both tweepy v1.1 and v2 for image tweets.
If this helped, share it on X — the irony won't be lost on me.
App by this blog's author
I built an iOS reading log app called
My Bookstore,
available on the App Store. If you want a simple way to track your reading, give it a try.
![Cover of the book 'Building a Personal Crypto Auto-Trading System — From Design to Operation [Complete Edition]'](https://onthehand.github.io/blog-images/2614345519980521662/btc_full_cover.png)