I built a system to automatically generate cover images and parts-illustration images for my weekly blog posts using a local GPU. This article walks through the entire evolution — from getting plain SDXL running, to using IP-Adapter to match real hardware photos, to img2img for hand-drawn watercolor illustrations — with 6 comparison images showing exactly how the output changes at each step. I also cover the VRAM constraints I hit on a 6GB machine and the approaches I chose to work around them.
All the tooling in this article was built by Claude Code, and 99% of the writing is Claude Code too — but the trial-and-error journey is real.
What you can do with this
- Understand the full setup for running SDXL on a Linux PC with a GTX 1660 SUPER (6GB VRAM) + 16GB RAM
- Generate AI images that closely resemble real hardware using IP-Adapter
- Produce hand-drawn watercolor illustrations using img2img + high denoise
- Learn how to work around out-of-memory errors common on 6GB VRAM machines
What I used
- ComfyUI — node-based SDXL inference framework
- Juggernaut XL v9 — photorealistic SDXL checkpoint (downloaded from Hugging Face, ~6.7 GB)
- ComfyUI_IPAdapter_plus — custom node for matching the look of a reference image
- IP-Adapter Plus SDXL model + CLIP-ViT-H vision encoder (combined ~3 GB)
- NVIDIA GeForce GTX 1660 SUPER graphics card (6 GB VRAM, check on Amazon) + Linux PC with 16 GB RAM
Why local generation?
At a pace of one blog post per week, API-based image generation services pile up a hidden "psychological cost per experiment." Every time I tweak a prompt five times, a small charge ticks up — and that feeling stops me from iterating freely. Running locally means the only cost is electricity. I can run --seed variations until I'm satisfied.
The other reason is wanting dependencies under my own control. APIs can break through spec changes, price hikes, or service shutdowns. With a local setup, as long as I keep the model files and the code, I can reproduce the exact same results five years from now.
Step 1: Get plain ComfyUI + SDXL running
First, install ComfyUI following the official guide and place Juggernaut XL v9 in checkpoints/. I ran txt2img with the prompt "watercolor illustration of XIAO ESP32-S3" and got this:
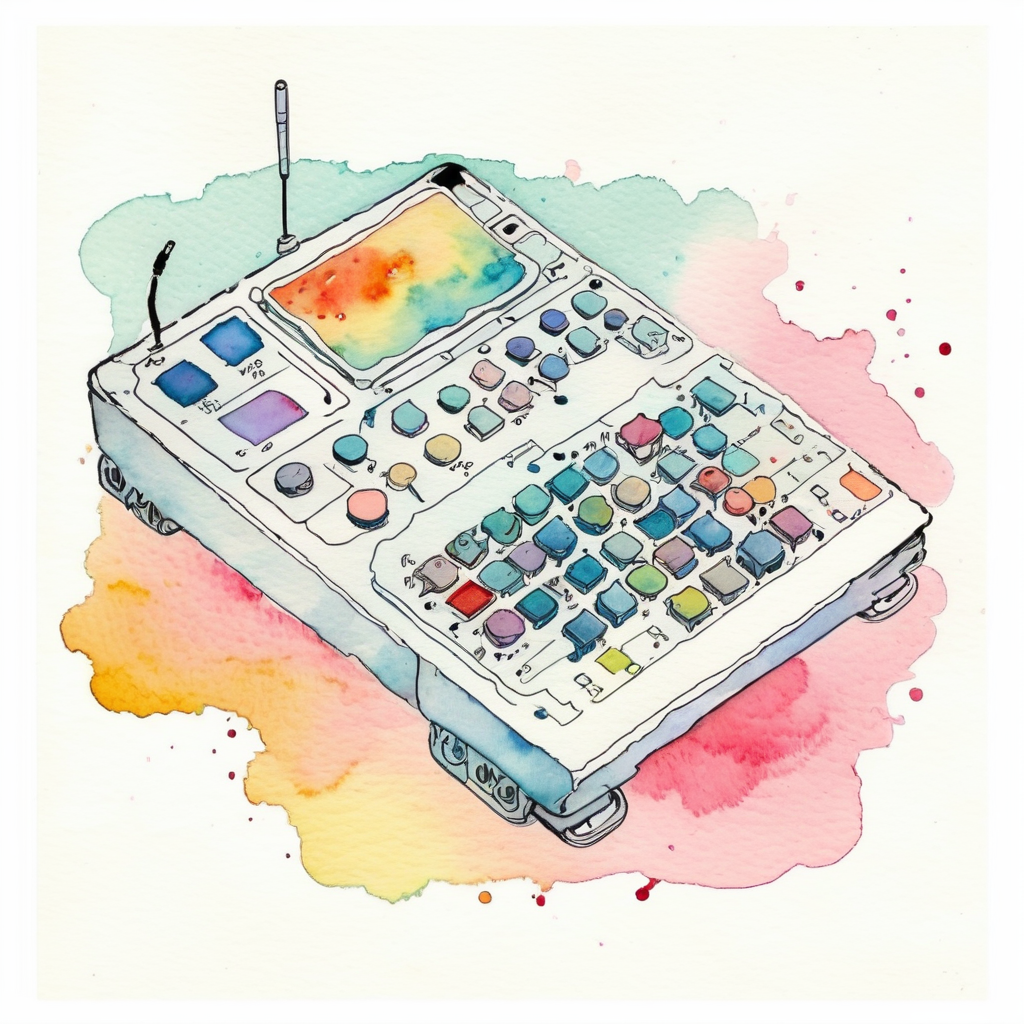
The watercolor style instruction went through, but the board is a fictional gadget. The base SDXL model hasn't learned specific board names, so it produces something plausible-looking but invented.
Step 2: Matching real hardware requires a reference image
When writing "I built a temperature monitor with this XIAO ESP32-S3," having an illustration of a completely different board hurts the article's credibility. To accurately render specific hardware the AI hasn't trained on, you need a mechanism to pass an actual product photo as a reference image. That's what IP-Adapter does.
Step 3: Adding IP-Adapter Plus
Clone ComfyUI_IPAdapter_plus into custom_nodes/, then download from Hugging Face:
ip-adapter-plus_sdxl_vit-h.safetensors(~700 MB) →models/ipadapter/CLIP-ViT-H-14-laion2B-s32B-b79K.safetensors(~2.5 GB) →models/clip_vision/
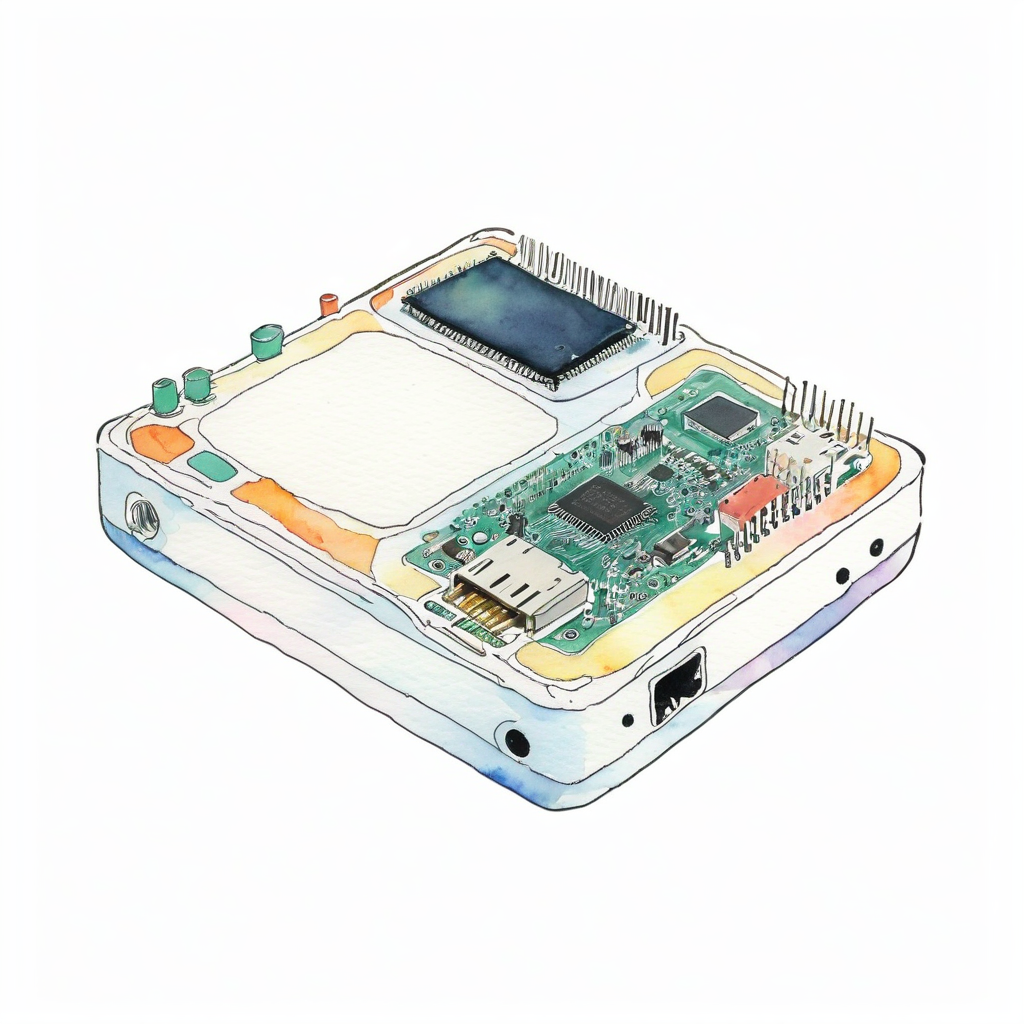
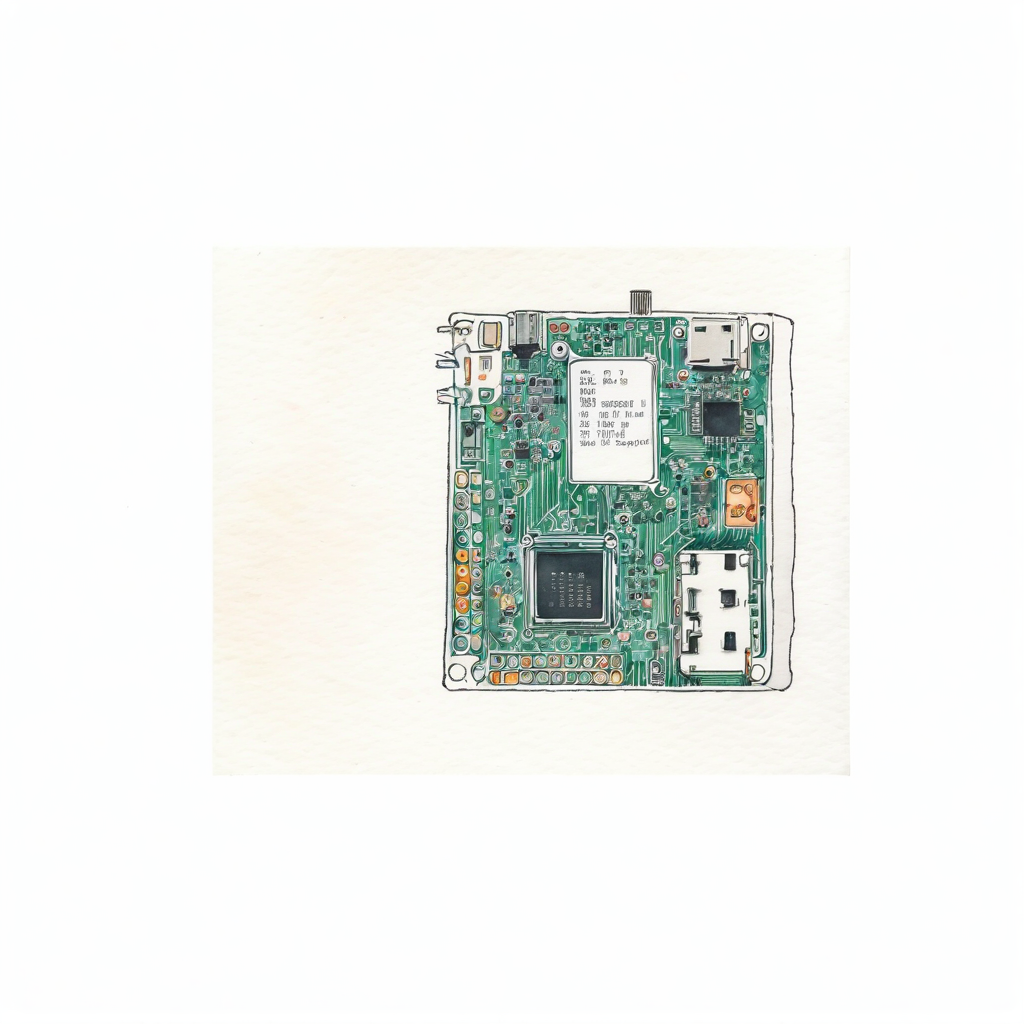
I fed the official XIAO product photo as a reference image at weight 0.5:
The real board structure is faithfully reproduced. The USB-C connector, the shielded wireless module, and the QR-code-like chip markings are all there — unmistakably a XIAO ESP32-S3. But look carefully and you'll notice the watercolor illustration instruction in the prompt has completely disappeared and the output is photorealistic.
IP-Adapter Plus is a "style transfer" type: the reference photo's colors, texture, and style transfer strongly into the output. Great for cover images where you want to match the real thing, but it gets in the way when you want an illustration style.
Step 4: I want to switch between "photo" and "illustration"
Photorealistic is fine for cover images. But in the "What I used" section of an article, I want illustration-style images to add visual variety. An entire article of photorealistic images all the way through feels monotonous.
Step 5: Lowering IP-Adapter weight (failed attempt)
The obvious idea was to lower the IP-Adapter weight — less photo influence means the style prompt should come through more. I dropped weight to 0.3 and added a strong negative prompt with (photorealistic:1.6):
Even at 0.3, the photo style dominates. The Plus variant has a tendency to keep style even at low weights, so it's fundamentally not suited for illustration conversion.
Step 6: Tried ControlNet — then shelved it
Next I tried ControlNet (Canny): extract only the edge lines from the reference photo, then let the prompt fully control color and texture. In theory, ideal for illustration conversion.
It works — but on a setup of 6GB VRAM + 16GB RAM, loading SDXL + IP-Adapter + ControlNet simultaneously caused frequent memory contention after extended runtime, causing the process to become unresponsive. Fine for a one-off, but unreliable for sustained operation.
I want blog generation running weekly via cron. If it stalls, no article comes out. A feature that "works but isn't reliable enough" doesn't belong in a cron job, so I conservatively shelved it.
Step 7: Solved with img2img + high denoise
The remaining path was img2img + high denoise. Here's how it works:
- VAE-encode the reference photo into an initial latent
- Set the KSampler's
denoisehigh (0.9 recommended) - The KSampler progresses from the initial latent — the higher the denoise, the weaker the initial latent's influence, and the more the prompt dominates
Result: the structure (component outlines and layout) faintly remains, but the prompt fully controls color, texture, and style. The key advantages:
- No additional custom nodes (uses only ComfyUI's built-in nodes)
- No additional model downloads
- Memory consumption is the same as txt2img
In other words, you get "outline reference + prompt-driven style" without ControlNet, and it runs stably on a 6GB VRAM machine.
Step 8: Finding the optimal denoise value through testing
The denoise value in img2img is the key quality lever. I compared 0.8 / 0.85 / 0.9 with the same prompt, same seed, and same reference image.
denoise 0.8
Still photo-leaning. The "watercolor" style instruction barely shows — the result looks like a light watercolor filter applied to a photo.
denoise 0.85
Bumping by 0.05 makes almost no difference. The photo character of the initial latent persists.
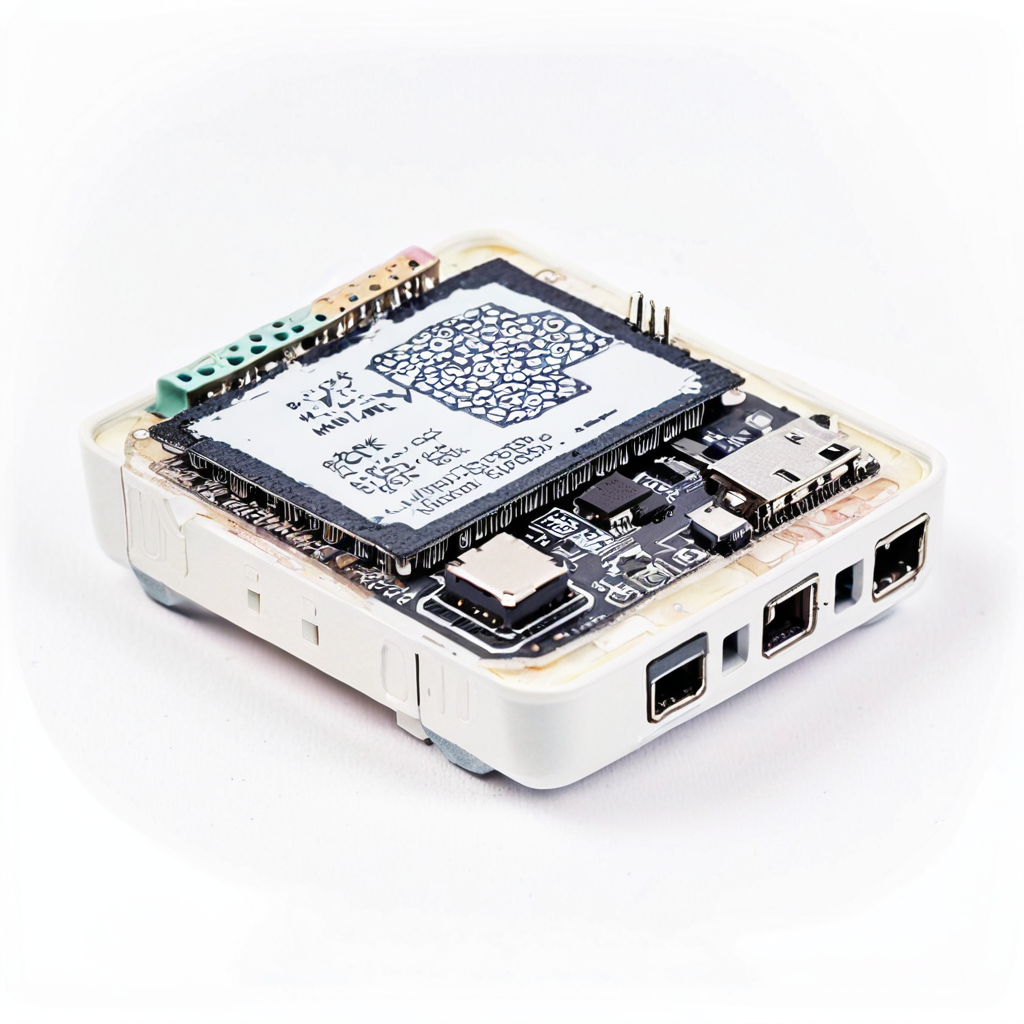
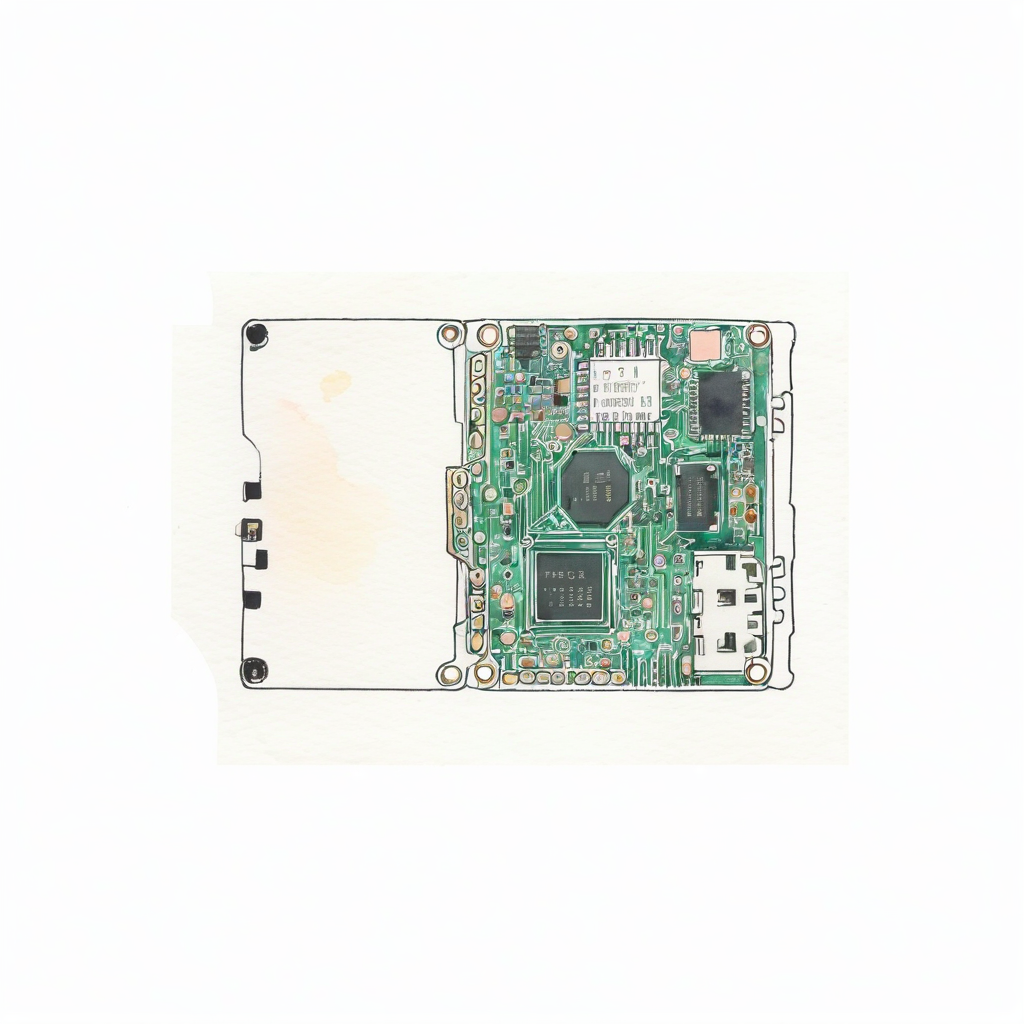
denoise 0.9
There it is. The softness of watercolor and the distinctive XIAO ESP32-S3 features (USB-C connector position, wireless module shield, castellated pin row) coexist. denoise 0.9 is the current best value.
Pushing to 0.95 tends to break the structure — you get "watercolor but no idea what board it is." 0.9 is the balance point where "shape hints remain, style is prompt-driven."
Step 9: Applying the finished pipeline to another article
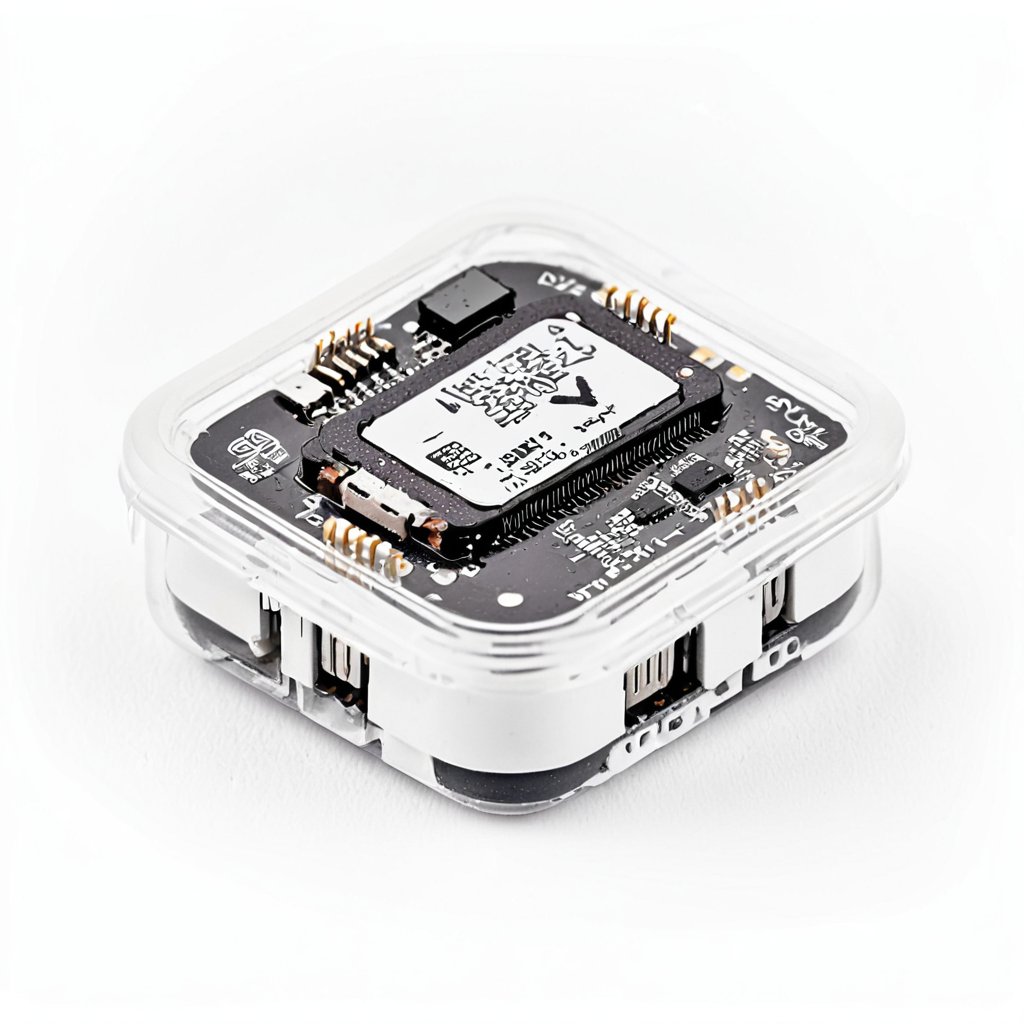
I used the same pipeline to generate a Raspberry Pi Pico 2 W illustration for a different article. Reference image from the Raspberry Pi official press release, denoise 0.9, generation time ~2 minutes:
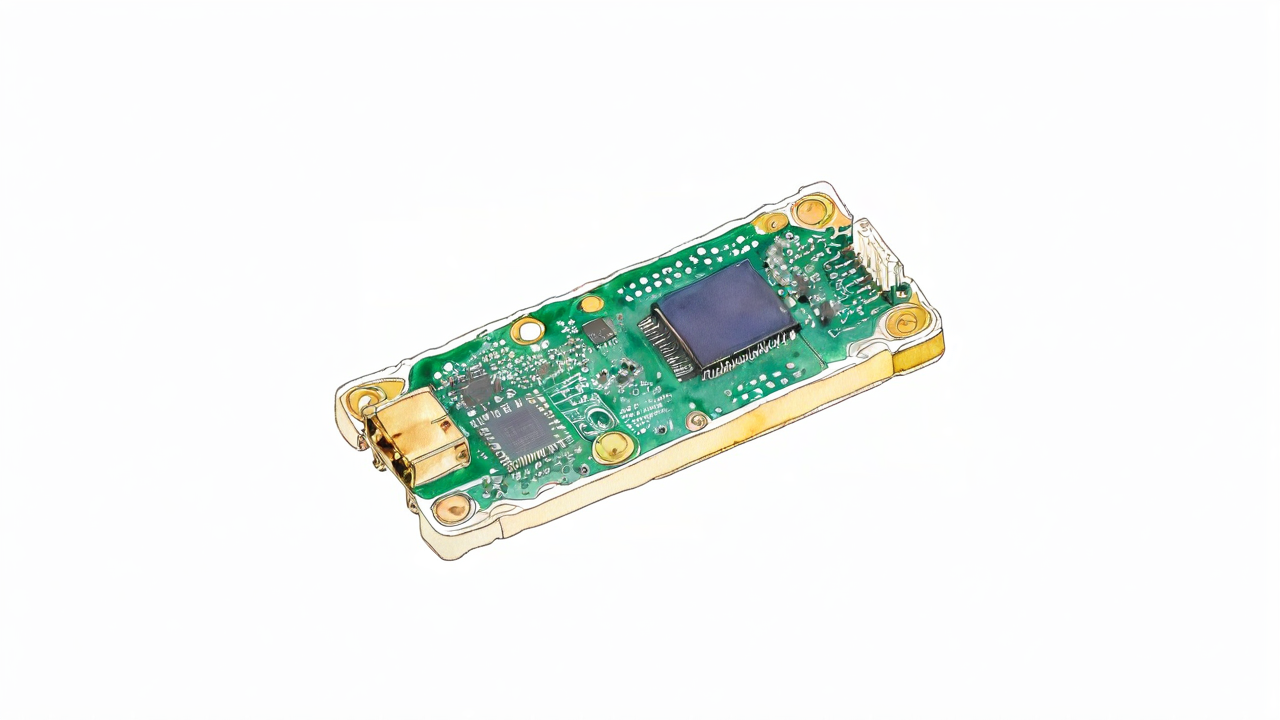
The green PCB, the gold castellated pins, the micro USB connector position, and the wireless module shield shape are all distinguishable. Swap in a different part with the same script and the same denoise 0.9 and you get this level of output. Confirmed reproducible.
FAQ
Q. Does it work with only 6 GB VRAM?
A. Yes. SDXL quantized to fp8 (via ComfyUI's --fp8_e4m3fn-unet startup option) uses around 4 GB, and with IP-Adapter the total is around 5.5 GB. Loading ControlNet simultaneously pushes close to the 6 GB limit and causes instability.
Q. How long does it take to generate one image?
A. On a GTX 1660 SUPER: txt2img at 15 steps is around 90 seconds, with IP-Adapter around 120 seconds, and img2img illustration at 25 steps around 120 seconds. Slower than cloud GPUs, but the only cost is electricity, so you can iterate without limit.
Q. Why doesn't denoise 0.7 or 0.8 work as well?
A. In img2img, the lower the denoise, the more the initial latent (the reference photo's structure) survives in the output. At 0.7–0.85, the photo character subtly persists and overpowers the illustration prompt. At 0.9, the initial latent's influence drops to roughly "shape hints only," and the style becomes fully prompt-driven.
Q. Why not try the non-Plus base IP-Adapter?
A. The plain ip-adapter_sdxl_vit-h.safetensors is said to transfer style more weakly than Plus, so it remains an option. However, img2img + high denoise wins on operational simplicity — no additional custom nodes, no additional model downloads — so that's what I'm using for now.
Note: The steps in this article were verified as of May 2026, but ComfyUI version updates or IP-Adapter model changes may cause them to stop working as written. If something doesn't work, please let me know in the comments.
Wrap-up
Step by step — SDXL → IP-Adapter → img2img — I showed how adding each feature shifts the output from "generic gadget → photorealistic real hardware → hand-drawn illustration", with 6 actual generated images to demonstrate the progression.
On a 6 GB VRAM machine, the approach that turned out to be simplest and most reliable was "no extra custom nodes, memory usage on par with txt2img." img2img + high denoise isn't a new technique, but it deserves a second look as a way to get around IP-Adapter's style transfer problem.
"More features = better results" isn't always true. The flexibility to switch approaches based on constraints turned out to be the most important skill for local AI image generation.
If this article was helpful, I'd love it if you shared it on X (Twitter).
App by the author of this blog
I made an iOS reading management app called My Bookstore. Simple bookshelf management — give it a try.
Related articles
- ESP32-S3 + ESPHome DIY CO2 Monitor for Your Room [2026 Edition · Home Assistant Integration] — IoT article using the XIAO ESP32-S3 that was the reference image subject here
References
Note: This article is part of an automated blog update experiment using Claude Code.
No comments:
Post a Comment