Wednesday, May 27, 2026

Setting Up HyperFrames on a Linux Server [GPU-Free, Japanese Font Tofu Fix Included]

This is a build log for engineers who want to generate videos programmatically on a Linux server. Using the open-source video rendering engine HyperFrames, I set up an environment that converts HTML/CSS/GSAP animations into MP4 files via headless Chrome and FFmpeg — on an Ubuntu server without sudo privileges. This covers everything, including the fix for the hardest part: Japanese font tofu (text rendering as □□□).

What You Can Do

  • Convert HTML/CSS/GSAP animations into MP4 videos automatically
  • Set up a video generation environment on a Linux server without GPU or Docker
  • Understand and fix the Japanese font tofu problem (text showing as □□□)

Tools Used

  • HyperFrames — HTML/CSS to MP4 rendering engine (OSS, Apache 2.0)
  • nvm — Node.js version manager (installs without sudo)
  • Node.js 22 — runtime for HyperFrames (v22+ required)
  • FFmpeg — video encoder (installed via static binary, no sudo)
  • Python 3 — for the caller wrapper script

Background

I came across HyperFrames on X (Twitter). A post describing it as an OSS tool that converts HTML to video without GPU or Docker spread widely among engineers. It looked like a perfect fit for my use case, so I dug in.

I needed a way to generate MP4 videos automatically from other scripts over SSH — without occupying a GPU and without Docker. HyperFrames fit the bill: CPU rendering, standard Web technologies, and a regular Linux user environment.

Environment: Ubuntu 22.04, no sudo (regular user).

Steps

1. Install Node.js 22+ via nvm

HyperFrames requires Node.js 22 or higher. Most Ubuntu environments ship an outdated Node.js via apt, so we install via nvm at the user level.

$ curl -o- https://raw.githubusercontent.com/nvm-sh/nvm/v0.39.7/install.sh | bash
$ source ~/.bashrc
$ nvm install 22 && nvm alias default 22
$ node -v
v22.x.x

Common pitfall: nvm installs node under ~/.nvm/versions/node/v22.x.x/bin/. When scripts run over SSH, ~/.bashrc is not sourced, so this path is missing from PATH. Add the following to the top of any SSH-invoked script:

export NVM_DIR="$HOME/.nvm"
source "$NVM_DIR/nvm.sh"

2. Install FFmpeg (static binary)

To install FFmpeg without sudo, grab the pre-built static binary and place it in ~/.local/bin/.

$ mkdir -p ~/.local/bin
$ cd /tmp
$ curl -L https://johnvansickle.com/ffmpeg/releases/ffmpeg-release-amd64-static.tar.xz \
    | tar xJ
$ cp ffmpeg-*-static/ffmpeg ~/.local/bin/
$ echo 'export PATH="$HOME/.local/bin:$PATH"' >> ~/.bashrc
$ source ~/.bashrc
$ ffmpeg -version | head -1

3. Install HyperFrames

$ npm install -g hyperframes
$ hyperframes --version

4. Install Headless Chrome

HyperFrames uses headless Chrome for frame capture. The following command downloads it automatically.

$ hyperframes browser ensure

Make sure node and ffmpeg are in PATH before running. Verify with which node && which ffmpeg.

5. Fix Japanese Font Tofu (the Hardest Part)

With font-family: 'Noto Sans JP' in the HTML template, Japanese text renders as tofu (□□□). The HyperFrames log says "Fetched 1116 font face(s) for Noto Sans JP from Google Fonts" — yet the text is still broken.

Root Cause

Google Fonts delivers Noto Sans JP split across Unicode range subsets. HyperFrames only cached the Latin subset (81 KB). The CJK subset containing Japanese glyphs (4–5 MB per weight) was never downloaded.

Since headless Chrome reads system fonts directly, the fix is to install the full TTF into the system font directory.

Fix

Use curl to download the TTF directly. Browser User-Agent spoofing is required — without it, Google Fonts returns a woff2 subset URL instead of the full TTF, and the tofu problem persists.

$ mkdir -p ~/.local/share/fonts

# Spoof User-Agent to get the full TTF (required)
$ curl -L -A 'Mozilla/5.0 (X11; Linux x86_64)' \
    'https://fonts.gstatic.com/s/notosansjp/v56/-F6ofjtqLzI2JPCgQBnw7HFowAA.ttf' \
    -o ~/.local/share/fonts/NotoSansJP-Regular.ttf

# Rebuild font cache
$ fc-cache -f ~/.local/share/fonts/

# Verify
$ fc-list | grep "Noto Sans JP"

If fc-list shows NotoSansJP, it worked. Note: the version number in the URL (v56) may change. For a URL-independent alternative, download the full zip from the Google Fonts page, extract to ~/.local/share/fonts/, and run fc-cache -f.

Before / After

Here are the actual videos before and after the fix.

Before — Japanese text renders as □□□ (tofu)
After — Japanese text renders correctly

6. Python Wrapper Script (Optional)

If you need to call HyperFrames over SSH from other scripts, a thin Python wrapper helps. Key design points:

  • Accept --prompt "text" and generate the HTML composition internally (isolates callers from HyperFrames' HTML schema)
  • Support style selection via arguments (fade / slide / motion)
  • Use fcntl.flock for mutual exclusion when called from multiple processes

The caller only needs to know "SSH one command, get back an MP4 file" — internal HTML template changes don't require updating callers.

Completed System

Caller Script (SSH)
▼ --prompt "text" --output video.mp4
Python Wrapper (HTML gen + lock)
▼
HyperFrames (Node.js + Chrome + FFmpeg)
▼
MP4 Video (720p / 30fps)

No daemon, command execution only. One SSH call returns a video file.

FAQ

Q. I get nvm: command not found

A. This happens when ~/.bashrc is not sourced during SSH execution. Add source "$HOME/.nvm/nvm.sh" to the top of your script.

Q. hyperframes browser ensure fails

A. Check that both node and ffmpeg are in PATH. Run which node && which ffmpeg — both paths should appear.

Q. Chinese or Korean text is also tofu

A. Same root cause. Install the full TTF for that font into ~/.local/share/fonts/ and run fc-cache -f.

Q. The video is black

A. Chrome may be capturing frames before the first render. Increase the delay in your composition config or adjust when CSS animations start.

Q. Does Node.js 20 work?

A. Node.js 22+ is the official requirement. Switch with nvm install 22 && nvm use 22.

※ The steps and commands in this post were verified at the time of writing (May 2026). They may break with library or OS updates. If something doesn't work, let me know in the comments.

Summary

I set up HyperFrames on a sudo-less Ubuntu server. The biggest pain point was Japanese font tofu — caused by Google Fonts' subset delivery and headless Chrome reading system fonts directly. Downloading the full TTF with a browser User-Agent and installing it to the system font directory fixes it cleanly.

If this post helped, share it on X (Twitter) — much appreciated.

A Promo Video Built with HyperFrames

To put it all together, I made a 30-second promo video for this blog — ON THE HAND — using HyperFrames. It combines past post images with fade transitions and text captions. Japanese text renders correctly after the font fix.

ON THE HAND blog promo video (generated with HyperFrames, 30 sec)

App by the Author

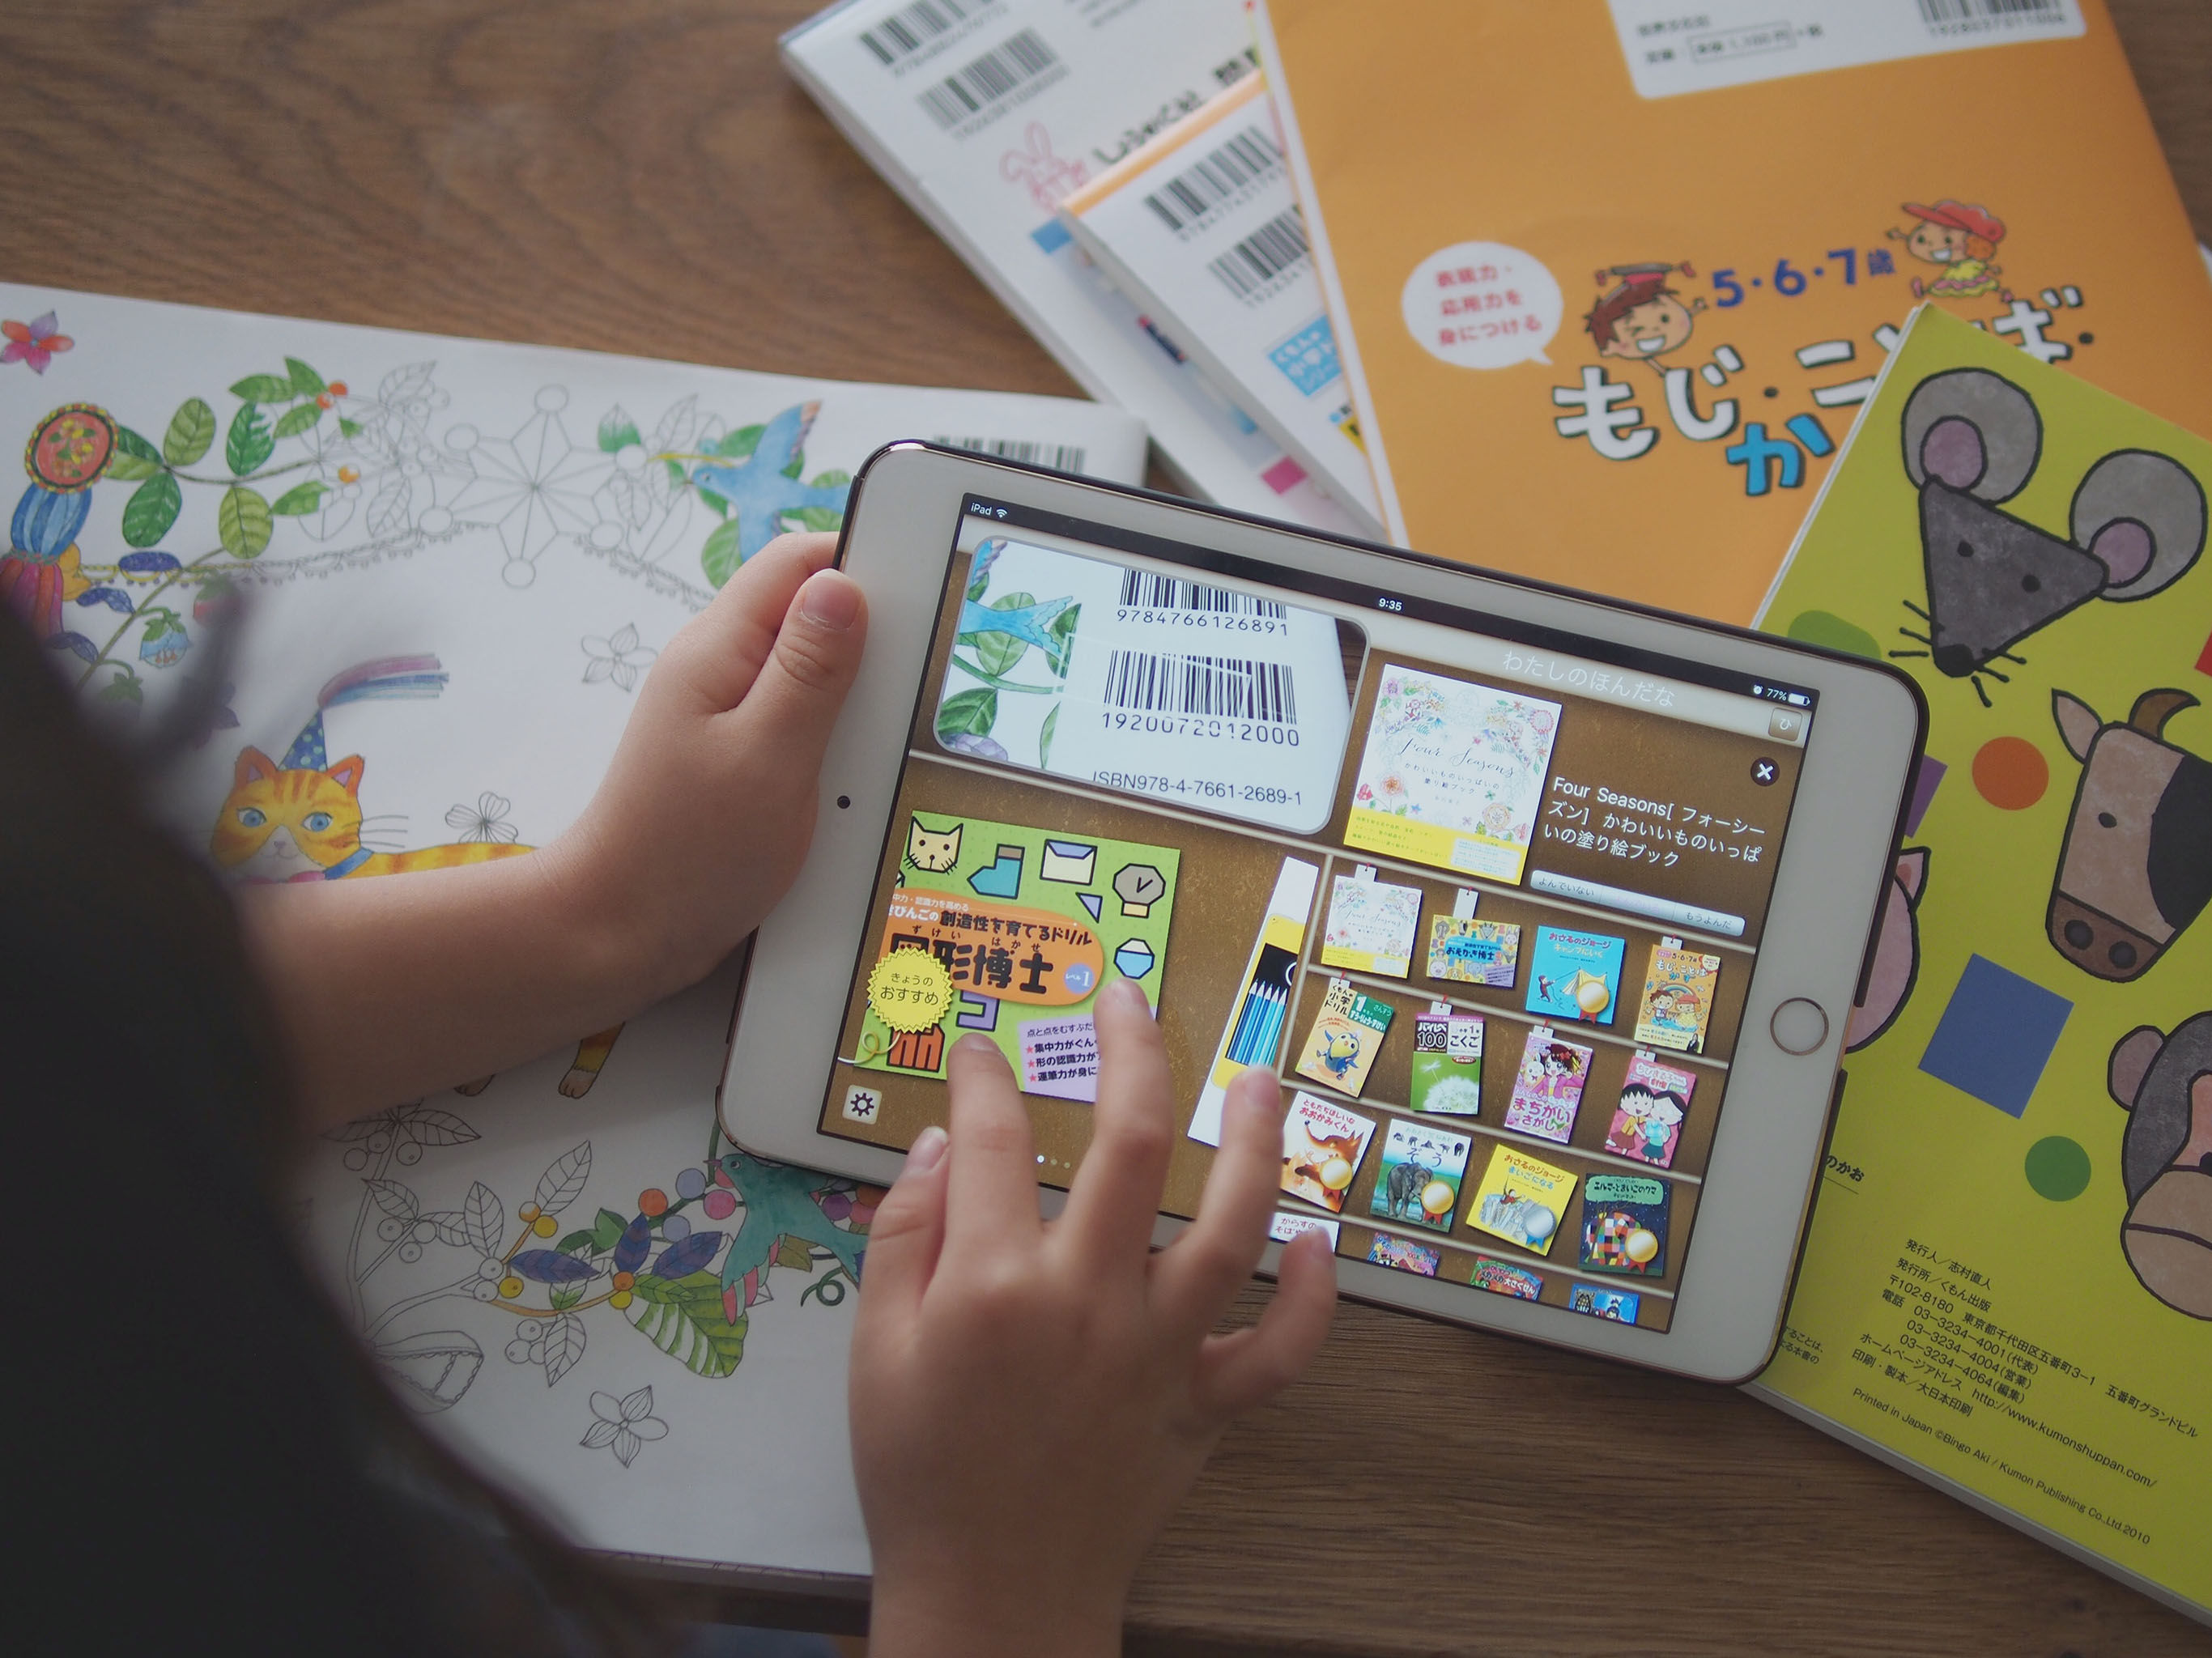
I built an iOS reading tracker app called My Bookstore, available on the App Store. Great for keeping a simple reading list.

View on App Store →

Related Posts

References

※ This blog is experimenting with Claude Code-assisted updates.

Friday, May 15, 2026

Automating Blog Updates with Claude Code [Topic Selection, Images, Weekly Cron — All the Trial and Error]

To publish blog posts consistently every week, I spent one day building a system that hands topic selection, article generation, image integration, and automated posting over to Claude Code. How do you surface "recent trends the LLM doesn't know about"? How do you design "two Claude Code sessions coordinating through git"? How do you keep "a Friday-night cron job" stable? This post covers all three rounds of trial and error and where each one landed. With Claude Code, a system this size gets up and running in a single day.

Watercolor illustration of a desk with a laptop, handwritten notes, a microcontroller board, and a coffee cup

What you'll get from this post

  • An approach to automating blog topic selection with Claude Code
  • How to offload heavy work like image generation to a separate Claude Code session via git
  • The pitfalls of running headless under cron, and how to work around them
  • A way to think about where "let Claude Code handle it" ends and "a human decides" begins

What I used

  • Claude Code — Anthropic's CLI agent. The star of this post
  • Blogger (publishing target) + Blogger API v3
  • GitHub Pages — image hosting
  • Python — the topic-scouting script and the MCP server
  • WSL2 + systemd cron — fires every Friday at 18:00

First step: feed existing posts to Claude Code so it learns the voice

I've been writing this blog since 2015, and there are roughly 80 posts. When you have AI write a new one, anything that doesn't match the established voice, structure, and category mix reads as "someone else wrote this." That's jarring for regular readers and for people arriving from search alike.

So the first thing I did was have Claude Code read every existing post and summarize the style guide and topic tendencies. Concretely:

  1. Back up the HTML of every published post locally via the Blogger API (posts.list + posts.get)
  2. Ask Claude Code: "so that you can write as this same author going forward, analyze the stylistic traits, the section structures used most often, the category distribution, and the phrasing to avoid — and write it up so it can be reused"
  3. Save the output to memory (Claude Code's mechanism for persistently holding project-specific knowledge)

Examples of what it extracted:

  • Phrasing habits: practical-article vocabulary like "the shortest path," "I'll write all of it," "where you'll get stuck," and the right dose of the author's humour (keep it to one or two sentences)
  • The section structure used most: lead → what I used → steps → where you'll get stuck → wrap-up → related posts
  • The distribution across 14 categories: electronics / Raspberry Pi / Arduino / IoT / AI / 3D printing / product reviews / Roomba / gadget modding / speech synthesis, and so on
  • Phrasing to avoid: excessive emoji, a tone so serious it narrows the audience, and repeated hedging
  • The full list of post titles from the past 8 years: the source for duplicate-checking so the same topic isn't covered twice

With all of that in memory, Claude Code can write new posts as a continuation of its past self. Continuity between newly generated posts and older ones holds up. Because memory persists across sessions, there's no need to paste a long style guide into the prompt every time.

Why automate it

I want to publish consistently every week. At the same time, I don't have the hours to research "what's been going on lately" from scratch each round.

If you simply ask Claude Code to "write about a trending electronics topic," it pulls from topics it already knew at training time. That drifts slightly away from the last year's trends and from what I'm actually interested in.

The fix was to feed in "recent trends," "my own interests," and "avoid overlap with past posts" as structured information from outside. Give up on having the LLM do it all, do the legwork ahead of time in a Python script, and hand the result to Claude Code as input.

The overall flow

Friday 18:00 cron
▼
Claude Code session for BlogGen
topic scouting → article generation → image integration → draft posting
┃
20 RSS sites + SNS
topic scoring
Claude Code on another machine
image generation service
GitHub Pages
image hosting
▼
draft posted via Blogger API
▼
a human reviews it → hits publish

Sticking point 1: topic selection — surfacing trends the LLM doesn't know

This is where I struggled most. Even with the voice pinned down by memory, deciding what to write about is a separate problem.

First attempt: WebSearch alone → the keywords skew

I started by asking Claude Code to "write about a trending electronics topic" and letting it run WebSearch a few times. In practice the keywords skew. They converge on the standbys the LLM knows well — "Raspberry Pi," "ESP32," "Home Assistant." It couldn't focus on recent releases (Pico 2 W, XIAO ESP32-S3, SCD41 and the like), and it kept circling back to material I'd already covered.

The cause: the WebSearch queries themselves depend on words inside the LLM's knowledge space. It doesn't know the new words, so they never make it into the query, so the results never surface the new trends — a chicken-and-egg problem.

The fix: feed in structured "trends from the past year" from outside

I wrote research_topics.py, which periodically pulls 20 RSS feeds — 10 Japanese, 10 international — and extracts and scores keywords from the past year of article titles. The breakdown:

  • 10 Japanese: Qiita, Zenn, MONOist, ASCII.jp, Gizmodo Japan, Kaden Watch, ITmedia, IoT News, deviceplus, ROBOT WATCH, and others
  • 10 international: Hackaday, Adafruit Blog, Hackster, CNX Software, Tom's Hardware, The Verge, Engadget, Home Assistant Blog, Ars Technica, and the official Raspberry Pi blog

Japanese sources alone skew toward domestic material, so running the 10 international feeds alongside them surfaces stories that broke overseas but haven't been covered in Japanese yet. Topics that are big abroad but absent from Japanese sites become candidates in the "first Japanese-language write-up" slot.

The scoring formula

Each keyword gets a score:

score = frequency × (1 + cross_source × 0.4) × cross_region_bonus × affiliate_fit × novelty × sns_boost
  • frequency: how many articles the keyword appeared in over the past year
  • cross_source: how many sites mention it (broad coverage scores higher)
  • cross_region: a bonus if it appears in both Japanese and international sources (a more reliable trend)
  • affiliate_fit: whether the topic maps to a physical product you can buy on Amazon (microcontrollers, sensors, and parts score high; pure software scores low)
  • novelty: cross-checked against the list of past post titles (fetched via the Blogger API) — topics already covered get pushed down
  • sns_boost: see below

The SNS signal: a 2× boost for gadgets I've actually touched

What the world is talking about and what I've personally mentioned on social media are two different things. The former alone doesn't reflect my own interests, and writing about hardware I've never tried produces thin material.

So I download the official X and Facebook archives (the ZIP you get from a personal data export), unpack them under sns_data/, and extract keywords from a year of my own posts. Keywords that appear in the external RSS feeds and that I've also touched on social media get a 2× boost.

What rises to the top, then, is the intersection: topics the world is excited about that I've also had my hands on. Those I can write about from experience.

I refresh the SNS archives manually once a month or so. Using the official archive instead of scraping an API means nothing breaks when X or Facebook change their API terms, and the images come bundled too, so they double as photo material for posts.

The blocklist: separating "gadget hacking" from "life hacks"

Another snag: generic words like "life hack" kept climbing into the top results — app combinations, time-saving tricks, and other general-interest material this blog's readers aren't here for.

I filtered those out with an explicit blocklist. I needed a string-based rule that distinguishes "electronics modding" from "a handy life tip." It's obvious to a human, but the LLM's judgement wobbles, so pinning the rule down as literal strings is more stable.

22 article types, rotated

One more layer: a taxonomy of 22 "article types", so I don't ship microcontroller-plus-sensor builds week after week. A few of them:

Type Description
AMicrocontroller + sensor (Pico/ESP32 + I2C temperature/humidity/CO2 → MQTT, etc.)
BModding off-the-shelf gadgets / API hacking (SwitchBot, Echo, AirTag, etc.)
C3D printing + building mechanisms
DAI at the edge (Ollama on a Pi, local speech and image recognition)
MRetro and emulation
NClocks and timekeepers (word clocks, Nixie clocks, E-ink calendars)
POS migration, dual boot, turning machines into servers (Asahi Linux, Proxmox, etc.)
TDev environments, IDEs, workflows (Node-RED, WSL2, Claude Code — this post's type)
…14 more (robotics, wireless and comms, power, audio, storage, reviews, wearables, custom PCs, and so on)

A classifier maps keywords to types with regular expressions, and which types dominate the last 5 posts is included in the research_topics.py output. Per instructions in CLAUDE.md, Claude Code follows the rule "if 2 or more of the last 5 posts share a type, pick a different one." That's what keeps two microcontroller-plus-sensor posts from landing back to back.

What the output looks like

The script produces a candidate list like this each run (simplified):

# Type distribution across the last 5 posts: A×2, B×3 → prefer anything but A and B

# Top 8 candidate topics

1. ✨🌐💰 Pipe CO2 readings from a XIAO ESP32-S3 into Home Assistant via ESPHome [type A]
   Basis: mentioned by 4 JP × 6 international sites / touched on 3 times on social / high affiliate fit

2. 🌐💰 Turn a Famicom clone into a Wipeout port machine [type M, retro]
   Basis: mentioned by 5 international sites (no JP coverage) / medium affiliate fit

3. 💰 Turn a Mac mini into a Linux server with Asahi Linux [type P, OS migration]
   ...

(truncated)

Each candidate carries ✨ SNS signal / 🌐 cross-region / 💰 affiliate fit flags, along with the supporting evidence and the matching article type. Claude Code picks one to three of them that don't collide with the recent type distribution and moves on to the deep dive (the hacking-techniques research in Step 1-C).

Splitting the work this way — structured information fed in from outside, the LLM doing the choosing — got topic selection working reasonably well.

Sticking point 2: where do the images come from

The cover image (the OG image) is what shows up as the thumbnail when a post is shared, so going without one costs you a lot of click-through. An LLM can't generate images on its own, so this needs an external service.

I tried the options: uploading manually through the Blogger admin (a bad fit for API automation), the xAI Grok API (monthly subscription), and running SDXL on a local GPU (what I went with). I landed on standing up ComfyUI on a PC with a GTX 1660 SUPER, generating locally, and serving the results through GitHub Pages.

The build-out of that local GPU image server itself — plus pushing generations toward how the real hardware looks, or converting them into watercolor illustrations — is covered in detail in the previous post on generating blog images on a local GPU. This post picks up from there and focuses on how I used Claude Code once I wanted to evolve that image service.

Sticking point 3: getting two Claude Code sessions to coordinate through git

This was the most interesting part. The side that writes posts (BlogGen) and the side that generates images (ImgGen) live in separate repos, on separate machines, with separate responsibilities. Each has its own Claude Code session.

But they still need to move together. When I wanted to add a --style illustration option on the ImgGen side, for instance, the calling side in BlogGen needed to know that spec too.

The approach I took: make a spec file in git the contract both sides read.

BlogGen side
article generation, caller scripts, hosts the spec
ImgGen side
separate machine, the image service itself, the implementation
┃ ┃
the spec in git (docs/<feature>_spec.md)
the contract both sides read

The cycle in practice:

  1. Stage 1 (spec filed): the BlogGen session writes the new feature's argument names, expected behavior, and workflow JSON spec into the spec file and pushes
  2. Stage 2 (implementation): the ImgGen session (on the GPU box) pulls, implements, and pushes back
  3. Stage 3 (verification): BlogGen pulls, runs real tests, and checks the quality of the generated images
  4. Stage 4 (feedback): BlogGen appends the measured values (recommended parameters) to the spec and flips the status to ✅

What worked well:

  • Nothing stalls: while the ImgGen side implements, BlogGen can move on to other verification or article generation
  • Less API drift: with the spec acting as a contract, "the argument name is subtly different" mostly stops happening
  • Each session only has to think about its own repo: lower cognitive load
  • The record lives in git history: which phase ran, when, and from which session is all traceable

Where it bit me:

  • An overwrite from concurrent edits: once, the ImgGen side had pushed a separate fix just before BlogGen pushed the spec. I didn't notice, PUT with a stale SHA, and nearly overwrote it — recovered with the commit right after
  • The lesson: when updating the spec with the gh CLI, always re-fetch the latest SHA with gh api repos/.../contents/foo --jq .sha immediately before the PUT
  • When renaming an argument, always leave a backward-compatible alias (otherwise the caller breaks)

Sticking point 4: the Friday cron and the permission allowlist

Every Friday at 18:00 JST, cron runs Claude Code headless with --permission-mode acceptEdits. It executes the given prompt once and exits.

First attempt: a silent timeout on the cron run. The cause was permissions. In an interactive session Claude Code asks "may I run this Bash command?" each time; headless, there's no one to answer, so it stalls on anything not already allowed.

The fix: pre-register the necessary Bash patterns and WebFetch domains under permissions.allow in .claude/settings.local.json. An allowlist approach, adding the operations you need one at a time.

An operational note: every time a new tool call becomes necessary, the allowlist needs another entry. I skim the cron logs (logs/weekly_draft_*.log) weekly, find the operations that stalled for lack of permission, and add them to settings.local. "Run it, break it, fix it" turned out to be faster than "read everything up front and add it all without gaps."

One example: a compound scp pattern like Bash(scp take@host:* *) is invalid when :* sits in the middle of the pattern. You have to rewrite it as Bash(scp take@host:**), with :* at the end. Local snags like that surface too — Claude Code's /doctor command warns about them, so you can catch them.

Sticking point 5: what to hand to Claude Code vs. what a human decides

"Let the AI do everything" is scary. "Have a human do everything" puts you back at the original problem (no time). You need a line.

The design I settled on:

Phase Owner
Trend extraction from RSS / SNSscript
Picking one topic from the candidatesClaude Code
Generating the article HTMLClaude Code
Checking pharmaceutical and advertising-law wordingClaude Code
Searching for and fetching reference imagesClaude Code
AI image generationseparate session
Pushing images to GitHub PagesClaude Code
Posting the draft via the Blogger APIClaude Code
The final publish buttonhuman
Checking facts and the titlehuman

The key is stopping at the draft. It posts a draft through the Blogger API, but it doesn't press publish. A human reads it and does the final pass on voice, facts, and title before it goes out.

That makes a bad post reversible, which buys psychological safety while Claude Code is experimenting. It mattered in practice: during the stretch when the early topic-selection script was churning out "life hacks," and while I was tuning image generation parameters, stopping at the draft is what let me try things without worrying.

FAQ

Q. What happens if draft generation fails?

A. Cron starts weekly_draft.sh and Claude Code runs; if it stalls partway or lacks a permission, an error is left in the log and no draft appears. That's all. It just runs again the following Friday, so nothing catastrophic happens.

Q. Why split Claude Code into two sessions? Can't one do both?

A. They're physically separate machines (one is the PC with the GPU, the other my everyday Linux box), so the Claude Code session pinned to each environment can reach different things. Running them separately means each only has to think about its own repo, which lowers cognitive load. Making the spec in git the contract is what makes this style work.

Q. Won't you go fully automatic and publish without review?

A. No. Keeping "a human looks at it last" as a premise is what makes it easy to experiment with AI generation. Misinformation and regulatory wording can't be fully checked automatically, so the last gate stays with a human.

Q. How often does the topic-selection script run?

A. On each cron run, so once a week. It computes the past year's keyword analysis from RSS and the SNS archives on the spot, so the results change every week. The SNS archives get re-downloaded and overwritten manually every month or so.

Q. How long did it take to build?

A. One full day. The RSS scouting script, the MCP server, the Blogger API integration, the cron setup, and CLAUDE.md (including the blocklist and style guide) — Claude Code wrote all of it while I talked to it over the CLI. A system that would normally take weeks of spec work, implementation, and debugging gets to a working state in one stretch of conversation.

Q. How do you keep the voice and structure aligned with the AI?

A. I fetched the past posts locally via the Blogger API and had Claude Code analyze the stylistic traits, section structures, and category tendencies, then saved that to memory. Memory persists across sessions, so there's no need to paste a long style guide into the prompt for every new post. Claude Code assembles articles as a continuation of its past self.

※ The steps in this post were verified at the time of writing (May 2026), but version updates to Claude Code, the Blogger API, and the various open-source pieces may mean they no longer work as written. If something doesn't work, let me know in the comments.

Wrap-up

The design decisions that mattered when automating a blog with Claude Code come down to four:

  1. Feed past posts to the AI and save the voice and category tendencies to memory: establish the continuity of "writing as a continuation of my past self" first
  2. Give up on "the LLM does it all": structure recent trends, your own interests, and the list of past posts in Python and feed them in from outside. Trying to write from the LLM's knowledge alone converges on the standbys
  3. Coordinate two sessions through a spec in git: for work spanning separate machines and repos, "nothing stalls" and "less API drift" pay off substantially. Treating a spec as a contract generalizes well beyond Claude Code
  4. A human presses the publish gate: stopping at the draft makes failure reversible, which makes it easy to experiment with AI generation. Not aiming for full automation is what ends up moving automation forward

The thing I want to emphasize is how fast it came together. The RSS scouting script, the MCP server, the Blogger API integration, the cron setup, CLAUDE.md (blocklist and style guide included) — Claude Code wrote all of it in one day. Spec work, implementation, and debugging that would normally take weeks moved in one stretch, just by talking over the CLI. Because you can run a loop of "explain what you want in words → a working implementation appears almost immediately," the cost of experimenting with design decisions drops dramatically.

Since then the rhythm has been: a draft lands on Friday night, I review it over the weekend, and it goes out. By not aiming for full automation and keeping "a human looks at it last" as the premise, I can widen what I delegate a little at a time.

If this post was useful, I'd be glad if you shared it on X (Twitter).

Related posts

References

Monday, May 11, 2026

Building SD1.5 + ControlNet on a GTX 1660 SUPER: RAM Was the Bottleneck, Not VRAM

A record of setting up SD1.5 + ControlNet on a GTX 1660 SUPER (6GB VRAM). What tripped me up wasn't a VRAM shortage — it was three things: "RAM spiking to ~26GB and OOMing," "all-black NaN images under fp16," and "a 3.2x slowdown from forcing the math SDPA backend." Later I also discovered that every one of my step timings had been distorted by spilling. Causes and fixes, all of it.

What you'll get from this post

  • An SD1.5 configuration where ControlNet runs on a 6GB GPU
  • The fp16 NaN problem on GTX 16xx (TU116) cards and how to work around it
  • Why sequential_cpu_offload eats RAM rather than VRAM
  • Final speeds: measured figures of ~5 s/image at Hyper-SD15 1-step and ~1 min/image at a full 25 steps

What I used

Background: I killed SDXL ControlNet after 1 hour and 13 minutes

Originally I was implementing ControlNet in a different environment, built on SDXL. The implementation finished running at 21:40 on 2026-04-30 — and by 22:53 I had committed its removal. One hour and thirteen minutes.

The cause was RAM. With enable_sequential_cpu_offload under SDXL, peak VRAM stays around 4GB. But with that mechanism the entire model stays resident in RAM. Add ControlNet on top (~5GB in fp32) and:

Configuration Peak VRAM Resident RAM Result
SDXL fp32 + FaceID ~4GB ~21GB ✅ (on a 24GB machine)
+ add ControlNet ~4GB (unchanged) ~26GB ❌ OOM

VRAM was never the problem. The cost of adding ControlNet lands on the RAM side. "It fits in 6GB of VRAM, so why the OOM?" only makes sense once you understand how sequential_cpu_offload works.

How sequential_cpu_offload actually works

The diffusers enable_sequential_cpu_offload moves the UNet's ~700 submodules into VRAM one at a time, runs inference, and moves each back to RAM — repeating that every step. The whole model stays resident in RAM. That's 700 CPU↔GPU round trips per step, with the Python GIL pinning one core at 100%.

SD1.5 is ~4GB total in fp32. It fits in 6GB of VRAM, so sequential_cpu_offload becomes unnecessary. That was the motivation for standing up a separate SD1.5 environment.

The three things that tripped me up

1. All-black NaN images under fp16 (a known GTX 16xx problem)

I ran a microbenchmark across five configurations:

Configuration Time per step Output
T1: SD1.5 fp16, no CN, math SDPA 15.8 s/step all black, 1224 bytes (NaN)
T3: + 1 ControlNet, math SDPA 22.6 s/step NaN
T4: + flash + mem-efficient SDPA 7.1 s/step NaN (faster, but still)
switched to fp32 (default SDPA) see below ✅ generates correctly

Changing the SDPA backend didn't make the NaNs go away. The cause is that the GTX 1660 SUPER (TU116) has no Tensor Cores. The fp16 softmax in the attention layer underflows and overflows. It's the same problem that AUTOMATIC1111 ships an official --no-half flag for on GTX 16xx cards. Switching to fp32 fixed it immediately.

2. Forcing the math SDPA backend was causing the 3.2x slowdown

The gap between T3 (22.6 s/step) and T4 (7.1 s/step). The culprit was code carried over from the other environment:

# inherited from the other environment (written as an fp16 NaN workaround)
torch.backends.cuda.enable_flash_sdp(False)
torch.backends.cuda.enable_mem_efficient_sdp(False)
torch.backends.cuda.enable_math_sdp(True)

Deleting this and letting PyTorch pick the backend automatically gives a 3.2x improvement. That said, flash SDPA is fp16/bf16 only, so once you move to fp32 you're back on the math kernel anyway. "Delete the forcing code and move to fp32" is the correct combination.

3. Every measurement had been distorted by spilling (discovered later)

After the environment was up, I started emitting a vram_peak_mb value into the generated images' metadata — and found that fp32 with one ControlNet was peaking at 6,726 MB. The effective ceiling for a GTX 1660 SUPER under WSL2 is about 6,100 MB.

Everything had been spilling. The early numbers (13.7 s/step, 5 min 55 s for a full 25 steps) were all measured while WSL2 was spilling into host RAM.

The fix is enable_model_cpu_offload (per-model, 5–10 CPU↔GPU swaps):

Configuration --offload none (spilling) --offload model (current default) Speedup
Full 25-step + 1 CN 584.7s / VRAM 6,726 MB 61.5s / VRAM 5,298 MB 9.5x
Hyper-SD15 4-step + 1 CN 62.9s / VRAM 6,680 MB 11.1s / VRAM 5,146 MB 5.7x
Hyper-SD15 1-step 32.4s / VRAM 6,680 MB 4.9s / VRAM 5,106 MB 6.6x
Multi-CN (2) 25-step 884.6s / VRAM 8,124 MB 680.1s / VRAM 6,694 MB 1.3x (still spilling)

With a single ControlNet, VRAM settles at 5.1–5.3GB and stops spilling, which is where the 9.5x comes from. With two ControlNets, --offload model still leaves you at 6.7GB and spilling, so the gain is limited.

Low-step distillation for SD1.5: what plays the role of SDXL Lightning?

Lightning, which I'd been using on SDXL, has no SD1.5 equivalent — ByteDance only released it for SDXL. The SD1.5 options:

  • LCM-LoRA (--lcm): 4 steps, ~10 s/image
  • Hyper-SD15 CFG-distilled (--hyper {1,2,4,8}): ~5 s at 1 step. Negative prompts have no effect
  • Hyper-SD15 CFG-preserved (--hyper-cfg {8,12}): ~4.5 min at 8 steps. Negative prompts work, and it's less prone to oversaturation

For exploring poses I run large batches at --hyper 1 (5 s/image); for finishing portrait shots, --hyper-cfg 8 (with negative prompts working) is the easier tool.

How the two environments divide the work (final form)

SD1.5 environment SDXL environment
Primary use exploring poses and composition final output, FaceID portraits
Speed (full 25 steps) ~1 min/image (61.5s measured) ~16 min/image
Speed (low-step distilled) Hyper 1-step ~5 s Lightning 8-step ~6–7 min
Resolution 512×768 (native) 1280×720 / 832×1216
ControlNet OpenPose / Canny / Depth ✅ ❌ (removed due to RAM limits)

The workflow I'd recommend: use --hyper 1 on SD1.5 (5 s/image) to burn through a lot of pose and composition attempts, then hand the chosen reference image over to the SDXL environment for the final output. SD1.5's OpenPose skeleton images can't be used directly with SDXL's ControlNet models — the latent spaces differ — but you can bridge the gap by passing the original reference image in as IP-Adapter input.

FAQ

Q. Is there any way to use fp16 on a GTX 1660 SUPER?

A. For now fp32 is the only option. TU116 has no Tensor Cores, and the fp16 softmax in the attention layer underflows and overflows. It's the same known issue behind AUTOMATIC1111's --no-half and ComfyUI's --force-fp32. On RTX 3060 or later (Ampere), fp16 works and flash SDPA should get you to 1–2 s/step.

Q. Is there a way to add ControlNet to SDXL after all?

A. A configuration without FaceID (txt2img + ControlNet only) runs in about 19GB of RAM. Using FaceID and ControlNet together pushes past ~26GB, so splitting that work off to SD1.5 is the realistic choice.

Q. How long does Multi-ControlNet (two at once) take?

A. About 11 min/image, because even with --offload model you're at 6.7GB of VRAM and still spilling. The gain over a single ControlNet is limited precisely because the spilling isn't fully eliminated.

※ The steps and figures in this post were verified in a May 2026 environment (diffusers 0.38, GTX 1660 SUPER, WSL2 + Ubuntu 22.04). Behavior may change with different library or GPU driver versions. If something doesn't work, let me know in the comments.

Wrap-up

I built an SD1.5 + ControlNet environment on a GTX 1660 SUPER (6GB VRAM, 24GB RAM). After three pitfalls — fp16 NaNs, the slowdown from forcing math SDPA, and measurements distorted by VRAM spilling — I ended up with a setup that does ~5 s/image at Hyper-SD15 1-step and ~1 min/image at a full 25 steps. Splitting duties with the SDXL environment (16 min/image) makes pose exploration much faster.

If this post was useful, I'd be glad if you shared it on X.

App by the author of this blog

I made an iOS reading management app called My Bookstore. Simple bookshelf management — give it a try.

View on App Store →

References

Sunday, May 10, 2026

Using X API with Python in 2026: No Free Tier, Auth Traps, tweepy v1.1+v2

This article is for developers looking to add X (formerly Twitter) auto-posting to their personal blog or bot. As of May 2026, X API has no free tier, and there are two authentication traps that aren't well-documented. Here's everything I ran into while connecting my own system — including the tweepy v1.1 / v2 split that's still unavoidable today.

What you'll be able to do

  • Auto-post to X with text and images using Python + tweepy
  • Understand the 2026 X API pricing (no free tier, pay-per-use)
  • Fix 401 and 402 errors when they hit you
  • Estimate your monthly cost before committing

What you need

  • tweepy (Python X API wrapper)
  • Python 3.11+
  • An X Developer Portal account (credit card required)

The state of X API in 2026

Short version: there is no free tier.

Older tutorials confidently say "Free tier works fine for personal bots." That's no longer true. When you open X Developer Portal today, the only option is the Basic plan with pay-per-use billing.

Pricing

  • $0.20 per tweet with a URL (tweets without URLs are billed differently — cheaper)
  • The monthly Spend Cap is unlimited by default — if you don't set one, charges can accumulate without any automatic ceiling
  • Hit the cap and API calls are blocked until the next billing cycle

Set a Spend Cap before you start. Without one, there's no automatic stop — charges just keep running.

After setting a cap, I hit it on my 4th test tweet:

Your enrolled account has reached its billing cycle spend cap.
API requests will be blocked until the next cycle begins on 2026-06-10.

Go to Developer Console → Billing → Spend limit to set or adjust your cap. You can raise it immediately if you hit it.

Gotcha 1: The 401 trap (regenerate your token after initial setup)

I created the app with "Read and Write" permissions from the start — no permission change involved. Yet every API call returned 401. The token showed as valid in Developer Portal, but requests kept getting rejected.

The fix: Regenerate your Access Token & Secret once after initial setup. The root cause isn't entirely clear, but a fresh token resolved it immediately.

Fix

  1. Developer Portal → App → Keys and tokens
  2. Click "Regenerate" on Access Token & Secret
  3. Update your code with the new token

If you're getting 401 right after setup, regenerating the token is the quickest thing to try. It's not documented prominently anywhere.

Gotcha 2: The 402 trap (no credit balance)

After regenerating the token, the next call returned 402:

Your enrolled account does not have any credits to fulfill this request.

Since there's no free tier, a zero credit balance blocks requests. Add a small top-up in Developer Console and it resolves immediately.

Implementation: tweepy v1.1 vs v2

To post a tweet with an image right now, you need both versions of the tweepy API simultaneously.

  • Tweet posting: tweepy v2 Client (OAuth 2.0)
  • Image upload: tweepy v1.1 API (v2 doesn't have media upload)
import tweepy

# ---- Upload image (v1.1) ----
auth = tweepy.OAuth1UserHandler(
    "{API_KEY}", "{API_SECRET}",
    "{ACCESS_TOKEN}", "{ACCESS_TOKEN_SECRET}"
)
api = tweepy.API(auth)
media = api.media_upload(filename="/path/to/image.png")
media_id = str(media.media_id)

# ---- Post tweet (v2) ----
client = tweepy.Client(
    consumer_key="{API_KEY}",
    consumer_secret="{API_SECRET}",
    access_token="{ACCESS_TOKEN}",
    access_token_secret="{ACCESS_TOKEN_SECRET}"
)
response = client.create_tweet(
    text="Your post title\nhttps://example.com/your-post",
    media_ids=[media_id]
)
print(response.data["id"])

Trying to do everything with v2 alone will fail — there's no media upload endpoint in the v2 API yet. Upload with v1.1, grab the media_id, pass it to v2 create_tweet.

Cost estimate

At $0.20/tweet with URL:

  • 3 posts/week × 4 weeks = 12/month → ~$2.40/month
  • 3 posts/week × 5 weeks = 15/month → ~$3.00/month

$3/month isn't a lot in absolute terms, but think about what you're actually getting. X auto-posting doesn't generate new content, and it doesn't unlock any extra API features. It's purely a distribution cost — paying to push your existing posts to a wider audience.

That math works out if the X traffic converts to something: affiliate clicks, ad impressions, newsletter signups. If your blog isn't monetized yet, you're essentially paying $3/month indefinitely with no return. Before setting this up, ask whether you have a revenue path that X traffic could feed into.

If you're posting daily, costs jump to $20-30/month — worth factoring in before you commit.

Related items

  • Raspberry Pi 5 4GB (check on Amazon) — if you want your posting bot running 24/7 on low power

FAQ

Q. Is there any way to use X API for free?

A. As of May 2026, Free tier doesn't exist. You'll need a credit card and a small top-up. Keeping post volume low (under 20/month) keeps costs under $5.

Q. My 401 error won't go away

A. If you're getting 401 after initial setup, regenerate your Access Token & Secret: Developer Portal → App → Keys and tokens → Regenerate. This works regardless of whether you changed app permissions.

Q. Do tweets without images also cost $0.20?

A. Yes — image presence doesn't affect the price. What matters is whether the tweet contains a URL. Tweets without a URL are billed at a lower rate than URL-bearing tweets ($0.20/each).

Q. Can I use the requests library instead of tweepy?

A. Yes, you can use raw requests with OAuth 1.0a. tweepy is recommended because it handles auth boilerplate and is actively maintained.

※ The steps and code in this article were verified in May 2026. X API pricing and tweepy's behavior may change. If something breaks, let me know in the comments.

Summary

X API in 2026 is pay-to-play. The "free bot" era is over. But for a personal blog announcing a few posts per week, $3/month is manageable. The two auth traps (token invalidation after permission change, zero-credit 402) aren't well-documented, so hopefully this saves you the 30 minutes I lost. And yes, you still need both tweepy v1.1 and v2 for image tweets.

If this helped, share it on X — the irony won't be lost on me.

App by this blog's author

I built an iOS reading log app called My Bookstore, available on the App Store. If you want a simple way to track your reading, give it a try.

View on App Store →

Related posts

References

※ This article is part of an automated publishing experiment using Claude Code.

Fixing Text-to-Speech Muting the System Audio [iOS Audio Session Conflicts, 2026 Edition]

This post is for iOS developers. After modernizing a seven-year-old app, AdMob, the camera, and text-to-speech started fighting over the audio session, and two problems appeared at once: music muting right after launch, and music never resuming after a title was read aloud. The cause was a known Apple bug (FB14444620) where text-to-speech never deactivates the shared session, and a one-line workaround fixed it. Here's all eleven rounds of trial and error, across builds 19 through 29.

App Store listing image for My Bookstore

What you'll get from this post

  • How AdMob, the camera, and speech synthesis end up fighting over the audio session, and how to resolve it
  • A workaround for the known Apple bug FB14444620 (speech synthesis not deactivating the shared session)
  • Why fixing the code wasn't enough to verify it without rebooting the device

Background: which app is this?

My Bookstore is an iOS reading management app released in 2017. After migrating the whole codebase to Xcode 26 / Swift 6 / SPM in v3.0.0, v3.1.0 was meant to be a small three-part release: refreshing the Amazon affiliate URLs, re-enabling AdMob, and adding Firebase Analytics.

When I went to verify AdMob on a real device, seven years of untouched speech-synthesis and camera code surfaced all at once. It turned into eleven cycles, builds 19 through 29. Builds 19–24 cleared out the camera and permissions problems; builds 25–29 were the fight with the audio session.

A three-way tug of war over the audio session

Two symptoms appeared together.

  • Music already playing on the system gets muted right after launch
  • After a barcode scan reads a book title aloud, the music never resumes

Three players, all fighting over the same AVAudioSession.sharedInstance().

Component How it interferes with the audio session
GADMobileAds.start() (AdMob) Overwrites the category with .soloAmbient internally (known AdMob behavior in this era)
AVCaptureSession (camera) Tries to configure the audio session automatically by default
AVSpeechSynthesizer (speech) Activates the shared session on every speak(), but never deactivates it afterward

The trial-and-error log (builds 25–29)

Build What I tried Result
25 AVCaptureSession.automaticallyConfiguresApplicationAudioSession = false No effect
26 Set .ambient + audioSessionIsApplicationManaged = true at launch, before AdMob No effect
27 setActive(false, .notifyOthersOnDeactivation) in didFinish No effect
28 Pre-activate the shared session before speak() Backfired (symptoms got worse)
29 synthesizer.usesApplicationAudioSession = false Fixed

The cause: known Apple bug FB14444620

Apple's documentation says that calling setActive(false, .notifyOthersOnDeactivation) lets other apps resume. That's correct. But AVSpeechSynthesizer doesn't remember that it activated the session, and never calls deactivate when it's done. It isn't in the official documentation, but it's a known issue (FB14444620) that Apple engineers have acknowledged on the Apple Developer Forums, along with a workaround.

The fix: detach the synthesizer from the shared session

// Keep the synthesizer away from the shared audio session
synthesizer.usesApplicationAudioSession = false

// Signal other apps that they may resume once speech finishes
func speechSynthesizer(_ synthesizer: AVSpeechSynthesizer,
                       didFinish utterance: AVSpeechUtterance) {
    try? AVAudioSession.sharedInstance().setActive(
        false, options: .notifyOthersOnDeactivation)
}

func speechSynthesizer(_ synthesizer: AVSpeechSynthesizer,
                       didCancel utterance: AVSpeechUtterance) {
    try? AVAudioSession.sharedInstance().setActive(
        false, options: .notifyOthersOnDeactivation)
}

With usesApplicationAudioSession = false, the synthesizer uses its own private session and stops interfering with the shared one.

Every fix in builds 25–28 was something Claude Code committed believing it would work, and on the device the music never came back once — because the code was wrong. Even after the build 29 code went in, the same symptom persisted at first; rebooting the device made it behave. The audio session state had been left behind in the OS, and the reboot cleared it. Even with correct code, you can't verify it without rebooting the device — that was the final lesson.

Other fixes

No preview after granting camera permission

AVCaptureSession.startRunning() can't run on the main thread, so I was calling it on a dedicated background queue — but setupCameraLayout() (repositioning the preview UIView) was being called on that same queue afterward. UIKit work is main-thread only, and that's why the preview never appeared.

sessionQueue.async {
    self.captureSession.startRunning()
    DispatchQueue.main.async {
        self.setupCameraLayout()   // hop back to the main thread for UI work
    }
}

A pile-up of prompts on first launch

Back when this shipped seven years ago, the only consent prompt iOS really put up was camera permission. Since then Apple has added ATT (ad tracking), notification permission, and location, year after year. It's easy to miss while an old app just keeps running, but the moment you modernize it and pick up a real device, four dialogs fire in a row — that isn't a bug in the code, it's the "consent debt" that iOS migration exposes.

The four that showed up: camera access (barcode scanning), ATT (AdMob's ad tracking), location (a feature that finds nearby physical libraries), and notification permission — all in a row on first launch. How I restructured it:

  • Notifications: deferred to the second launch onward (on first launch the user doesn't yet understand what the app is for)
  • Location: requested only when the library-search button is tapped
  • ATT: called in applicationDidBecomeActive (timing that doesn't collide with camera permission)

FAQ

Q. Does the music-stopping text-to-speech problem depend on the iOS version?

A. FB14444620 shows up particularly from iOS 17 onward. Part of it also depends on the combination with your AdMob SDK version, so try usesApplicationAudioSession = false first.

Q. Are there side effects to setting usesApplicationAudioSession = false?

A. The synthesizer uses a private session, so you no longer need to coordinate categories with other audio. If you want background music mixed in during speech you'll need to adjust, but if your only goal is "bring the music back after speaking," there are essentially no side effects.

Q. What if the symptom persists even with the build 29 code?

A. Reboot the device fully and check again. The audio session state lingers in the OS, and restarting the app alone doesn't always clear it.

※ The steps and code in this post were verified at the time of writing (May 2026) on Xcode 26 / iOS 17 / AdMob SDK 11.x. Behavior may change with different library versions. If something doesn't work, let me know in the comments.

Wrap-up

Picking up a real device to verify v3.1.0 turned into eleven TestFlight submissions. The root cause was a known Apple bug (FB14444620) where text-to-speech doesn't deactivate the shared audio session, and one line — usesApplicationAudioSession = false — fixed it. Porting a seven-year-old design as-is is what made it surface for the first time, under the new combination of iOS 17 and AdMob.

If this post was useful, I'd be glad if you shared it on X (Twitter).

App by the author of this blog

I made an iOS reading management app called My Bookstore. Simple bookshelf management — give it a try.

View on App Store →

Related posts

References

Friday, May 8, 2026

I Built a Hub-Worker Setup from Scratch with the CLI — Then Compared It to the Managed Agents API

Anthropic released the Managed Agents API, so I put it side-by-side with my own Hub-Worker setup — and the architecture was almost identical. Running 8 Claude Code CLI instances in parallel under tmux and wiring it all together by hand, only to find it matched Anthropic's official infrastructure — genuinely strange feeling.

This article compares my self-built setup against these three features:

  1. Managed Agents API — a cloud platform that manages agent definitions, environments, sessions, and events end-to-end
  2. Multiagent sessions — a multi-agent execution layer where a Coordinator orchestrates multiple Workers in parallel or in sequence (Research Preview)
  3. Dreams — an async job that reads past session logs and automatically reorganizes and rebuilds a memory store (Research Preview)

My self-built setup

Quick overview of my current setup for reference — full details in this article.

  • 8 Claude Code CLI instances managed in tmux sessions
  • Hub instance decomposes tasks and delegates to Worker instances via GitHub Issues
  • Worker triggers are tmux send-keys-based scripts
  • Governance rules are written down in POLICY.md, which each instance references autonomously
Self-built Hub-Worker setup
User (takeyasu)
▼ tmux send-keys
Hub (Claude Code CLI)
tmux: cl_orchestrator · governance via POLICY.md
▼ GitHub Issues + tmux send-keys trigger
BlogGen
ImgGen
ClaudeChat
… × 5
▼ read/write
WSL2 filesystem / Git repositories

Managed Agents API — the designs turned out almost identical

My first thought reading the Managed Agents API docs was "wait, I built this." Mapping the core concepts against my own setup:

Managed Agents API concept Self-built equivalent
Agent (model, system prompt, tool definitions) Each CLI instance with its role defined via CLAUDE.md + settings.local.json
Environment (container, packages, network config) WSL2 + per-repo .venv and path config
Session (a running agent instance executing a task) A Claude Code process inside a tmux session
Events (communication between app and agent) Writing to GitHub Issues + tmux send-keys triggers
Managed Agents API setup
Your App
▼ Events API (SSE)
Session (primary thread)
Coordinator Agent
defines model / system prompt / tools / MCP
▼ session threads (max 25) · 1-level delegation only
Worker
Agent 1
Worker
Agent 2
Worker
Agent 3
… up to
20 types
▼ read/write
Shared container
filesystem
Memory Store
(persistent memory)

The correspondence table and diagrams line up almost perfectly. The implementation differences, however, are significant. Pros & Cons:

Dimension Managed Agents API Self-built (Claude Code CLI)
Out-of-the-box tools Must define everything yourself Bash/Read/Write/MCP all come pre-loaded ✅
Linux ecosystem access Requires separate design Can autonomously run apt install and config changes ✅
Observability Real-time visibility into all threads via event stream ✅ Watch tmux output manually or via Monitor
Infrastructure ops Anthropic-managed. No environment maintenance needed ✅ WSL upkeep required — but restoreable from git
Cost Per-token API billing. Risk of costs spiking under heavy load Fixed monthly Max plan. Flat rate no matter how heavy the use ✅
Migration cost CLI assets can't be ported. Full rewrite required None (status quo) ✅

Multiagent sessions — problems the official version solves

Reading the Multiagent sessions docs clarified several places where my self-built setup falls short.

Dropped-ball detection. Each agent runs in a session thread — a context-isolated event stream — and state changes surface as events like session.thread_status_idle / session.thread_status_running that aggregate into the primary thread. In my self-built setup, a state where nobody throws the next ball fires nothing at all — that was the biggest blind spot. The official version solves this structurally.

Centralized tool confirmations. When a child agent is waiting for approval, requires_action is cross-posted to the primary thread. In my setup, confirmation requests are scattered across instances and easy to miss.

Using {"type": "self"} also lets the Coordinator fan out parallel copies of itself. Thread limits, delegation depth, and access requirements are summarized below.

Dimension Multiagent sessions Self-built (tmux + GitHub Issues)
Dropped-ball detection Structurally detected via thread_status_idle ✅ A state where nobody throws is silent. Requires manual watching or polling
Tool confirmation aggregation requires_action centralized in primary thread ✅ Scattered per instance. Easy to miss
Context continuity Threads persist. Prior context carries over on follow-up instructions ✅ Same (carries over as long as the tmux session is alive) ✅
Delegation flexibility Fixed at 1 level (depth enforced by the platform) Flexible — change it by updating POLICY.md ✅
Scale ceiling Hard cap: 25 threads, 20 agent types Unlimited within hardware and Max plan constraints ✅
Access requirements Research Preview — separate access request required Available right now ✅

Dreams — automated memory curation

Dreams is an async batch feature that reorganizes and rebuilds a memory store by reading past session logs (Research Preview, access request required). It never modifies the input store, so you can discard the output if you don't like it.

Key specs:

  • Input: existing memory store (required) + up to 100 past sessions (optional)
  • The instructions parameter lets you direct the curation (up to 4,096 characters — e.g. "focus on coding preferences, ignore temporary debug notes")
  • Supported models: claude-opus-4-7 / claude-sonnet-4-6
  • Billing: standard API token billing, proportional to the number and length of input sessions
  • Requires two beta headers: managed-agents-2026-04-01,dreaming-2026-04-21

In my self-built setup, memory updates are manual — and as the number of instances grows, it becomes impossible to keep up. The fact that the docs explicitly say "you can start from an empty store and feed only session logs" means incremental adoption is genuinely practical.

Dimension Dreams Self-built (manual memory management)
Execution trigger Runs automatically on a cron or on demand. Works without the user present ✅ Only when I ask "please learn this"
Scale Same flow regardless of instance count ✅ Can't keep up once instances multiply
Safety Input store untouched. Review output before swapping in ✅ Direct overwrites — unintended edits are hard to detect
Cost Scales with session volume. Risk of costs spiking under heavy load Stays within Max plan (no extra cost) ✅
Time to completion Minutes to tens of minutes (async job) Immediate, within the conversation ✅
Access requirements Research Preview — extra headers + access request required Available right now ✅

What building it yourself taught me

Having built it from scratch meant that when I read the Managed Agents API docs, the "why behind the design" clicked immediately. The 1-level delegation cap, thread persistence, aggregation into the primary thread — every one of those is a direct answer to a problem I hit while building my own version.

"Being able to use generative AI" is becoming table stakes. The next differentiator, I think, is — drawing responsibility boundaries between agents, context design, failure detection and recovery design — experience that can only be built by assembling something, breaking it, and learning from it. Same reason the early cloud architects who stood out weren't the ones who "knew AWS" — they were the ones who could explain how on-prem failure patterns translate into cloud avoidance strategies.

For now, with my self-built setup in place, the flexibility and flat-rate cost outweigh the cost of migrating to the API. But when the time comes to add significantly more Workers or normalize 24-hour unattended operation, that's when I'll seriously consider the move.

Wrap-up

Put a self-built CLI Hub-Worker setup next to the Managed Agents API and the designs are nearly identical. Where Multiagent sessions clearly wins: structural dropped-ball detection and centralized tool confirmations. Dreams is the answer to a memory management scaling problem that manual approaches can't keep up with — and the ability to start incrementally from an empty store is a big deal.

If this was useful, I'd love it if you shared it on X (Twitter).

FAQ

Q. Is the Managed Agents API available right now?

A. Yes — it's enabled by default for API accounts (beta header managed-agents-2026-04-01 required). Multiagent sessions and Dreams are Research Preview and require a separate access request.

Q. Is migrating from a self-built setup to the Managed Agents API painful?

A. CLI assets (Bash scripts, MCP servers, policy files) can't be ported, so it's effectively a full rewrite. If you migrate, treat it as a new project and redesign from scratch.

Q. Can I use the Managed Agents API on a Max plan?

A. The Managed Agents API is pay-per-token. Usage costs stack on top of the Max plan subscription. For Dreams, since billing scales with session volume, test with a small batch before ramping up to production scale.

Note: Information in this article is current as of May 2026. The Managed Agents API is a beta feature and specs may change. See the Anthropic official docs for the latest.

App by the author of this blog

I made an iOS reading management app called My Bookstore. Simple bookshelf management — give it a try.

View on App Store →

Related articles

References

Note: This article is part of an automated blog update experiment using Claude Code.